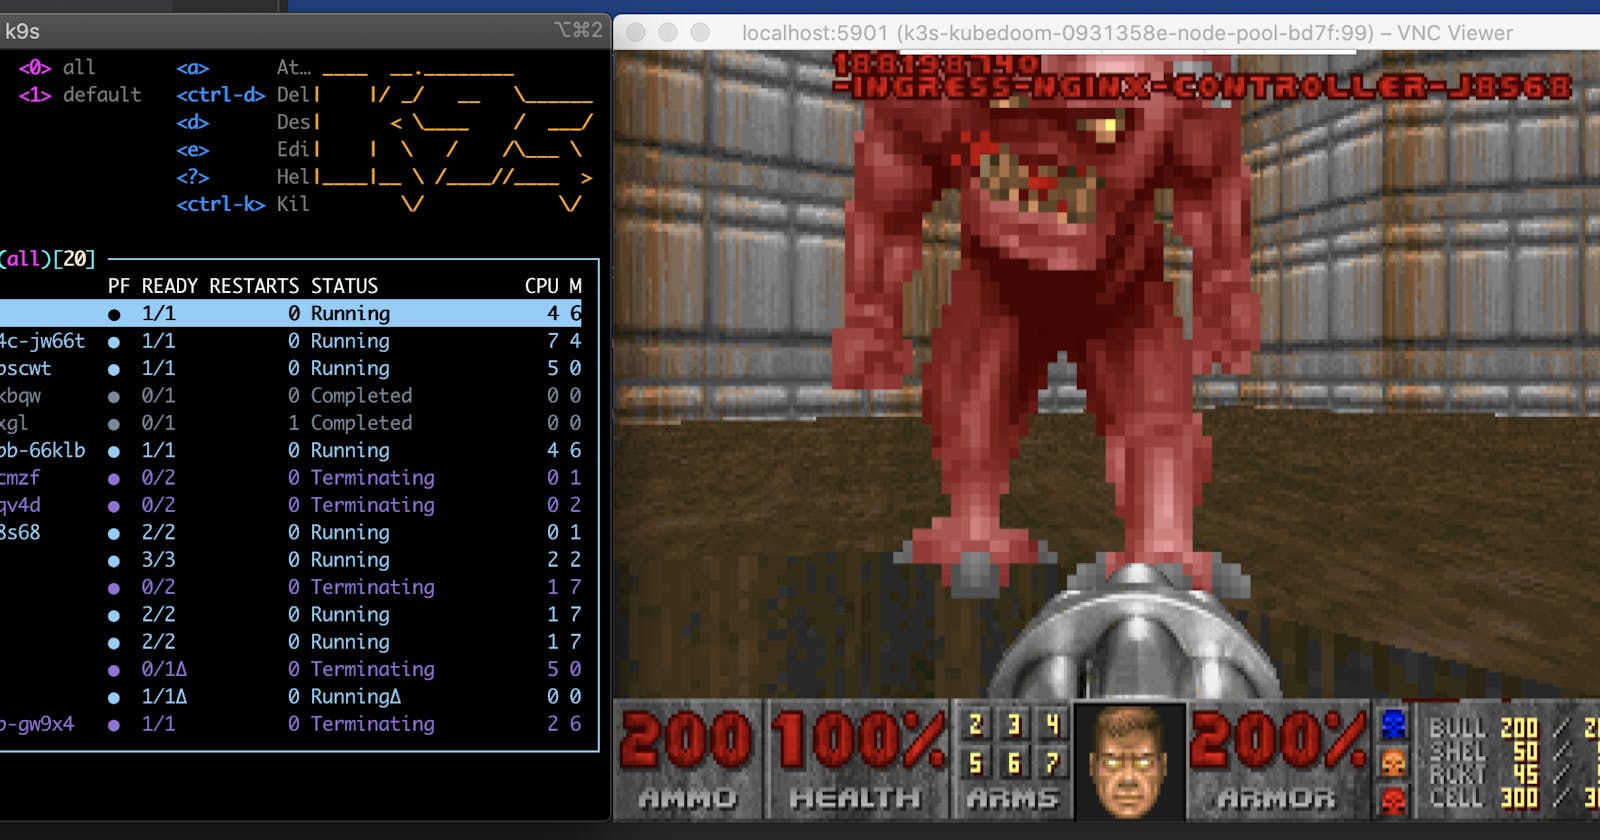
While browsing through Twitter or Youtube, I see all the cool chaos engineering frameworks like Chaos Mesh or LitmusChaos.
Without a doubt, these frameworks are amazing, and I would suggest to everybody to go and try them out. Saiyam Pathak has made some great videos about Chaos Mesh and Litmus and there will be a bigger meetup about Litmus coming.
But in these quick little lunch break demo, I show you how to use the Father of Chaos Engineering: Kube Doom
Kube Doom
I think there is no need to explain what Doom is. It would be close to an insult to do, but in a nutshell:
Doom is a 1993 first-person shooter (FPS) game developed by id Software for MS-DOS.
Now we mix this with Kubernetes, and we get Kube Doom. To come back to the chaos engineering part: In Kube Doom the enemies are all Pods of your cluster.
If you eliminate them, you will terminate the corresponding pod in your cluster. How cool is that!
Install
We are going to use Pulumi and the brand new civo-go template for this.
mkdir kubedoom
cd kubedoom
pulumi new --dir .
Now we can choose the civo-go template:
Please choose a template:  [Use arrows to move, enter to select, type to filter]
  aws-csharp                   A minimal AWS C# Pulumi program
  aws-go                       A minimal AWS Go Pulumi program
  aws-javascript               A minimal AWS JavaScript Pulumi program
  aws-python                   A minimal AWS Python Pulumi program
  aws-typescript               A minimal AWS TypeScript Pulumi program
  azure-csharp                 A minimal Azure Native C# Pulumi program
  azure-go                     A minimal Azure Native Go Pulumi program
  azure-python                 A minimal Azure Native Python Pulumi program
  azure-typescript             A minimal Azure Native TypeScript Pulumi program
> civo-go                      A minimal Civo Go Pulumi program
  gcp-csharp                   A minimal GCP C# Pulumi program
  gcp-go                       A minimal Google Cloud Go Pulumi program
  ...

Please choose a template: civo-go                      A minimal Civo Go Pulumi program
After this, you can set more details, for the sake of this demo, I let everything on default
This command will walk you through creating a new Pulumi project.

Enter a value or leave blank to accept the (default), and press <ENTER>.
Press ^C at any time to quit.

project name: (kubedoom)
project description: (A minimal Civo Go Pulumi program)
Created project 'kubedoom'

Please enter your desired stack name.
To create a stack in an organization, use the format <org-name>/<stack-name> (e.g. `acmecorp/dev`).
stack name: (dev)
Created stack 'dev'

Installing dependencies...

Finished installing dependencies

Your new project is ready to go! ✨

To perform an initial deployment, run 'pulumi up'

warning: A new version of Pulumi is available. To upgrade from version '3.7.1' to '3.8.0', run
   $ brew upgrade pulumi
or visit https://pulumi.com/docs/reference/install/ for manual instructions and release notes.
Download the Kube Doom kubernetes manifes files, we going to need them:
mkdir yaml
cd yaml
curl -L --remote-name  "https://raw.githubusercontent.com/Alynder/kubedoom/master/manifest/{00namespace,deployment,rbac}.yaml"
Set the CIVO token
export CIVO_TOKEN=xxx
Your final Pulumi deployment should look like this:
package main

import (
    "github.com/pulumi/pulumi-civo/sdk/go/civo"
    "github.com/pulumi/pulumi-kubernetes/sdk/v3/go/kubernetes"
    v1 "github.com/pulumi/pulumi-kubernetes/sdk/v3/go/kubernetes/apps/v1"
    "github.com/pulumi/pulumi-kubernetes/sdk/v3/go/kubernetes/yaml"
    "github.com/pulumi/pulumi/sdk/v3/go/pulumi"
    "path/filepath"
)

func main() {
    pulumi.Run(func(ctx *pulumi.Context) error {
        cluster, err := civo.NewKubernetesCluster(ctx, "civo-k3s-cluster", &civo.KubernetesClusterArgs{
            Name:            pulumi.StringPtr("kubedoom"),
            NumTargetNodes:  pulumi.IntPtr(3),
            TargetNodesSize: pulumi.StringPtr("g3.k3s.medium"),
            Region:          pulumi.StringPtr("NYC1"),
            Applications:    pulumi.StringPtr("cert-manager,Nginx,-Traefik"),
        })
        if err != nil {
            return err
        }

        provider, err := kubernetes.NewProvider(ctx, "kubernetes", &kubernetes.ProviderArgs{
            Kubeconfig: cluster.Kubeconfig,
            Cluster:    cluster.Name,
        }, nil)
        if err != nil {
            return err
        }
        kubedoom, err := yaml.NewConfigGroup(ctx, "kubedoom", &yaml.ConfigGroupArgs{
            Files: []string{filepath.Join("yaml", "*.yaml")},
        }, pulumi.Providers(provider))
        if err != nil {
            return err
        }

        deployment := kubedoom.GetResource("apps/v1/Deployment", "kubedoom", "kubedoom")
        if deployment != nil {
            kubeDoomDeployment := deployment.(*v1.Deployment)
            ctx.Export("VNC Port", kubeDoomDeployment.Spec.Template().Spec().Containers().
                Index(pulumi.Int(0)).Ports().Index(pulumi.Int(0)).ContainerPort())
        }
        ctx.Export("kubeconfig", pulumi.ToSecret(cluster.Kubeconfig))
        ctx.Export("name", cluster.Name)
        return nil
    })
}
Now we can use pulumi up -y to deploy the whole stack.
pulumi up -y
...
Outputs:
    VNC Port  : 5900
  + kubeconfig: "[secret]"
    name      : "kubedoom"

Resources:
    8 unchanged
To connect to our Kube Doom pod, we need now to create a port-forwarding to the VNC port. See the output
To get the kubeconfig and set the port-forwarding type:
pulumi stack output kubeconfig --show-secrets > civo.yaml
export KUBECONFIG=civo.yaml
kubectl port-forward deployment/kubedoom 5901:5900 -n kubedoom
Forwarding from 127.0.0.1:5901 -> 5900
Forwarding from [::1]:5901 -> 5900
Final you can log into kubedoom via vncviewer -> realvnc.com/en/connect/download/viewer
vncviewer viewer localhost:5900
Prompted for the password type idbehold
Us the cheat idspispopd to walk through the wall on your right. You should be greeted by your pods as little pink
monsters. Press CTRL to fire.
If you need bigger guns, cheat with idkfa and press 5 for the real deal.
Have fun Chaos Engineering...
Cleanup
To remove everything just type:
`pulumi destroy -y
...
     Type                             Name              Plan
 -   pulumi:pulumi:Stack              kubedoom-dev      delete
 -   ├─ pulumi:providers:kubernetes   kubernetes        delete
 -   ├─ kubernetes:yaml:ConfigGroup   kubeDOOM          delete
 -   ├─ kubernetes:yaml:ConfigGroup   kubedoom          delete
 -   └─ civo:index:KubernetesCluster  civo-k3s-cluster  delete

Outputs:
  - kubeconfig: "[secret]"
  - name      : "kubeDOOM"
...
Resources:
    - 5 to delete

