Running a Minecraft Server on an Exoscale Kubernetes Cluster using Pulumi and CUE

Cloud Native Pilgrim | Kubernetes Enthusiast | Serverless Believer | Customer Experience Architect @ Pulumi | (he/him) | CK{A,AD} |
TL;DR The code
As usual, here is the location of the code.
Introduction
To celebrate the launch of the Exoscale Pulumi provider, I decided to create a Pulumi program that deploys a Minecraft server on an Exoscale SKS cluster.
But to give the article a little plot twist, I decided to use CUE to define the Pulumi program. We create a CUE module that will define the Pulumi program and the actuel SKS cluster implementation will be defined as a CUE package.
So we can create several SKS cluster implementations using the CUE package.
Prerequisites
To follow this article, we` need to have the following tools installed:
CUECLI installedPulumiCLI installedExoscaleCLI (optional)
And we need to have an Exoscale account. Head over to Exoscale to create an account.
Exoscale?
Exoscale is a Swiss cloud provider, that offers a wide range of cloud services. It offers a wide range of cloud services like:
- Compute instances
- Kubernetes clusters
- Object storage
- Databases as a service (PostgreSQL, Redis, Kafka, Opensearch, MySql)
- DNS
It has several datacenters in Europe, which is really a nice, not only this gives us the possibility to deploy your applications in the datacenter that is closest to your users, but we can also create a high availability setup.
Following datacenters are available:
- Frankfurt (Germany)
- Munich (Germany)
- Zurich (Switzerland)
- Vienna (Austria)
- Geneva (Switzerland)
- Sofia (Bulgaria)
I am huge fan of European cloud providers, and I am happy to see that with Exoscale there is an alternative to the big three cloud providers.
Create your API key
As soon as you have created an account, you are able to create an API key. This API key will be used by Pulumi to create the resources.
Head over to the https://portal.exoscale.com/u/<account>/iam/api-keys page and create a new API key. You can give it a name, like pulumi, so you know what it is used for later.
And that's it, you have created your API key. Let us head over to install the Pulumi CLI.
Pulumi - Modern infrastructure As Code
Pulumi is an open-source infrastructure-as-code tool for creating, deploying and managing cloud infrastructure. Pulumi works with traditional infrastructures like VMs, networks, and databases and modern architectures, including containers, Kubernetes clusters, and serverless functions. Pulumi supports dozens of public, private, and hybrid cloud service providers.
Installing Pulumi
Before we can start to deploy our infrastructure, we need to install the Pulumi CLI. This can be done either on your local development machine or on your build agent. We cover the installation of the cli for some scenarios in the next section.
Pulumi stores metadata about your infrastructure so that it can manage your cloud resources and detected any changes betyouen two deployments. This metadata is called state.
Pulumi stores its state in a backend of your choosing. There are two types of backends:
- Service: a managed cloud experience using the online or self-hosted
PulumiService application - Self-Managed: There is a wide range of self-managed backends available from AWS S3, Azure Blob Storage, Google Cloud Storage, any AWS S3 compatible server to even your local filesystem.
Head over to Pulumi service to create your free SaaS backend. No need to handle state files.
Installation on macOS
You can install Pulumi through the Homebrew package manager and using the official Pulumi Homebrew Tap. Open a terminal and type the following command:
$ brew install pulumi/tap/pulumi
Installation on Windows
You can install Pulumi using elevated permissions through the Chocolatey package manager:
$ choco install pulumi
Installation on Linux
To install, run the installation script via the following command:
$curl -fsSL https://get.pulumi.com | sh
This will install the pulumi CLI to ~/.pulumi/bin and add it to your path. If this command fails at automatically adding pulumi to your path, you will be prompted to add it manually.
Alternatively, we can install Pulumi manually. Pulumi provided a prebuilt binary for Linux.
Head over to the available versions page to choose the version of Pulumi you want to install.
Extract the tarball and move the binaries in the pulumi directory to a directory included in your system’s $PATH.
Verifying your Installation
To verify that we have successfully installed Pulumi, run the following command:
$ pulumi version
v3.46.0
What is CUE?
CUE is a logical language for working with config, schemas, data, and executing on these things.
First, we should understand that CUE is not a general purpose language and instead aims for Turing-incompleteness. The underlying philosophy is that it is harder for both humans and tooling to understand configuration and data that has been programmed together.
Remember: CUE is a superset of JSON. This means we can represent any JSON in CUE with a slightly different syntax and then add the CUE magic to it!
Example: cars.json:
{
  "cars": [
    {
      "brand": "Ford",
      "model": "Mustang",
      "year": 1964
    }
  ]
}
And the same data in CUE:
cars: [
  {
    brand: "Ford"
    model: "Mustang"
    year: 1964
  }
]
Let's think about JSONSchema vs JSON, they are separate concepts. One defines a schema, the other is data. In CUE they are the same. CUE merges types and values into a single concept, the value lattice. This gives us the ability to define schemas, refine with constraints, and create valid data in the same file. It also means defining schemas is more natural with how we think about and write code as humans.
With CUE, when we write code, it is not instructions for the computer. Rather, we are specifying something and CUE tells we if it is valid or not. If this sounds weird right now, worry not, it becomes natural pretty quickly. Under the hood, CUE analyzes your code with graph unification algorithms based in part on NLP techniques from the 90’s (pre deep learning). Because of this, we can spread configuration across directories and packages, pulling common schema, constraint, logic, and values into reusable modules.
There is a good YouTube videos about CUE made from Matty and Alison Dowdney you can go check out:
Installing CUE
The CUE command line tool is available for macOS, Linux, and Windows. You can check on the official installation page for detailed instructions depending on your OS.
As I am using macOS and Homebrew, I will use the following command to install CUE:
brew install cue-lang/tap/cue
Verify that the installation was successful by running the following command:
cue version
And we should see the following output:
cue version 0.4.3 darwin/amd64
And that's it, we have installed CUE and are ready to start using it.
Create your Pulumi project
Pulumi is a multi-language infrastructure as code tool using imperative languages to create a declarative infrastructure description.
You have a wide range of programming languages available, and you can use the one you and your team are the most comfortable with. Currently, (11/2022) Pulumi supports the following languages:
- Node.js (JavaScript / TypeScript)
- Python
- Go
- Java
- .NET (C#, VB, F#)
- YAML
As we want to use CUE we will use YAML.
Create a project folder (for example pulumi-exoscale) and navigate into the newly created directory:
mkdir pulumi-exoscale && cd pulumi-exoscale
Create a new Pulumi program with the following command:
pulumi new yaml

This command will walk you through creating a new Pulumi project.

Enter a value or leave blank to accept the (default), and press <ENTER>.
Press ^C at any time to quit.

project name: pulumi-exoscale
project description: (A minimal YAML Pulumi program)
Created project 'pulumi-exoscale'

Please enter your desired stack name.
To create a stack in an organization, use the format <org-name>/<stack-name> (e.g. `acmecorp/dev`).
stack name: (dev) team1
Created stack 'dev'

...

Your new project is ready to go! ✨

To perform an initial deployment, run `pulumi up`
As we want to use CUE, we need to change following line in the Pulumi.yaml file:
runtime: yaml
to the following:
runtime:
  name: yaml
  options:
    compiler: cue export
The reason behind is that Pulumi YAML includes native support for languages that compile to YAML/JSON via the compiler runtime option and Pulumi will run whatever program and arguments are specified in compiler and interpret the output as a Pulumi YAML program.
Now we can start writing our infrastructure as code.
First, we need to create our CUE module. Create a new folder called cue.mod and create a new file called module.cue in it.
It contains the following content, which is the basic structure of a CUE module:
module: "exoscale.pulumi.com/minecraft"
Then we can create our first package. Create a new folder called sks and create a new file called sks.cue in it.
Now we can start to create our CUE schemas. For this we create two Defintions, one for the Minecraft server properties and one for the Exoscale SKS cluster.
#MinecraftServerProperties: {
    version: *"latest" | string
    type:    *"VANILLA" | string
    motd:    *"Hello from Exoscale" | string
}
Here we see also the first CUE feature, which is the default value. We can define a default value for a field by using a * before the type. In this case, we define the default value for the version field to be latest and for the type field to be VANILLA. The motd field gets the default value Hello from Exoscale.
Now we can create our second definition for the Exoscale SKS cluster:
#ExoscaleMinecraft: {
    resourceName:              strings.MaxRunes(10) & =~"^[a-z0-9-]+$"
    sksZone:                   string
    sksVersion:                *"1.25.1" | string
    sksCNI:                    *"calico" | string
    sksNodePoolSize:           int & >=1 & <=10
    sksNodePoolInstanceType:   *"standard.medium" | string
    mcNamespace:               *"minecraft" | string
    mcChartVersion:            *"4.4.0" | string
    minecraftServerProperties: #MinecraftServerProperties

    variables: {
        "default-sec-group": {
            "fn::invoke": {
                function: "sks:index/getSecurityGroup:getSecurityGroup"
                arguments: {
                    name: "default"
                }
            }
        }
    }

    resources: {
        "\(resourceName)-mc-cluster": {
            type: "sks:SKSCluster"
            properties: {
                zone:          sksZone
                name:          "\(resourceName)-mc-cluster"
                exoscaleCcm:   true
                metricsServer: true
                version:       sksVersion
                cni:           sksCNI
            }
        }

        ...

        if sksCNI == "calico" {
            "\(resourceName)-calico-vxlan-security-group-rule": {
                type: "sks:SecurityGroupRule"
                properties: {
                    securityGroupId:     "${\(resourceName)-mc-sks-security-group.id}"
                    description:         "Calico (vxlan)"
                    userSecurityGroupId: "${\(resourceName)-mc-sks-security-group.id}"
                    type:                "INGRESS"
                    protocol:            "UDP"
                    startPort:           4789
                    endPort:             4789
                }
            }
        }

        "\(resourceName)-minecraft-tcp-security-group-rule": {
            type: "sks:SecurityGroupRule"
            properties: {
                securityGroupId: "${\(resourceName)-mc-sks-security-group.id}"
                description:     "Minecraft TCP services"
                cidr:            "0.0.0.0/0"
                type:            "INGRESS"
                protocol:        "TCP"
                startPort:       25565
                endPort:         25565
            }
        }

        "\(resourceName)-minecraft-chart": {
            type: "kubernetes:helm.sh/v3:Release"
            properties: {
                name:      "minecraft"
                namespace: "${\(resourceName)-minecraft-namespace}"
                chart:     "minecraft"
                version:   mcChartVersion
                repositoryOpts:
                    repo: "https://itzg.github.io/minecraft-server-charts/"
                values: {
                    resources: {
                        requests: {
                            memory: "128Mi"
                            cpu:    "100m"
                        }
                    }
                    minecraftServer: {
                        eula:        true
                        version:     minecraftServerProperties.version
                        type:        minecraftServerProperties.type
                        motd:        minecraftServerProperties.motd
                        serviceType: "LoadBalancer"
                    }
                }
            }
            options:
                provider: "${\(resourceName)-mc-k8s-provider}"
        }
    }

    outputs: {
        "\(resourceName)-kubeconfig": {
            "fn::secret": "${\(resourceName)-mc-sks-kubeconfig.kubeconfig}"
        }
    }
}
This is a lot of code, so let's break it down. Please note that this is not a complete CUE schema, we can check the full schema in the corresponding GitHub repository.
Similar to the MinecraftServerProperties definition, we define again different fields with default values. But this time I do also some more advanced things. First, I define a variable called resourceName which is a string with a max length of 10 characters and only allows lowercase letters, numbers and dashes.
resourceName: strings.MaxRunes(10) & =~"^[a-z0-9-]+$"
Another advanced feature is the validation of the sksNodePoolSize field. We can use the & operator to combine multiple validations. In this case, we validate that the value is an integer, greater or equal to 1 and less or equal to 10.
sksNodePoolSize: int & >=1 & <=10
If we ran cue vet with a wrong value for the sksNodePoolSize field, we would get the following error:
❯ cue vet .
servers.0.resources."server-1-mc-nodepool".properties.size: invalid value 300 (out of bound <=10):
    ./sks/sks.cue:16:41
    ./main.cue:9:19
servers.0.sksNodePoolSize: invalid value 300 (out of bound <=10):
    ./sks/sks.cue:16:41
    ./main.cue:9:19
Same for the name field, entered a wrong value would result in the following error:
cue vet .
servers.0.resourceName: invalid value "Server-1" (out of bound =~"^[a-z0-9-]+$"):
    ./sks/sks.cue:12:52
    ./main.cue:6:19
    ./sks/sks.cue:12:29
...
Another interesting feature is the if statement. We can use it to define different resources depending on the value of, in this case, the sksCNI field. If the value is calico, we define a different security group rule as if set the value to calico
if sksCNI == "cilium" {
    "\(resourceName)-cilium-vxlan-security-group-rule": {
        type: "sks:SecurityGroupRule"
        properties: {
            securityGroupId:     "${\(resourceName)-mc-sks-security-group.id}"
            description:         "Cilium (vxlan)"
            userSecurityGroupId: "${\(resourceName)-mc-sks-security-group.id}"
            type:                "INGRESS"
            protocol:            "UDP"
            startPort:           8472
            endPort:             8472
        }
    }
    "\(resourceName)-cilium-healthcheck-tcp-security-group-rule": {
        type: "sks:SecurityGroupRule"
        properties: {
            securityGroupId:     "${\(resourceName)-mc-sks-security-group.id}"
            description:         "Cilium (healthcheck)"
            userSecurityGroupId: "${\(resourceName)-mc-sks-security-group.id}"
            type:                "INGRESS"
            protocol:            "TCP"
            startPort:           4240
            endPort:             4240
        }
    }
}

if sksCNI == "calico" {
    "\(resourceName)-calico-vxlan-security-group-rule": {
        type: "sks:SecurityGroupRule"
        properties: {
            securityGroupId:     "${\(resourceName)-mc-sks-security-group.id}"
            description:         "Calico (vxlan)"
            userSecurityGroupId: "${\(resourceName)-mc-sks-security-group.id}"
            type:                "INGRESS"
            protocol:            "UDP"
            startPort:           4789
            endPort:             4789
        }
    }
}
Now let's take a look into some Pulumi YAML specific things. The Pulumi YAML specification follow a simple schema, including four top level sections: resources, config, variables and outputs.
The resources section is the most important one. It defines the resources that should be created. The minimum required fields are type and properties.
Here is an example of a resource definition:
resources:
  my-bucket:
    type: aws:s3:Bucket
    properties:
      website:
        indexDocument: index.html
So in our case, as we want to maybe create more the one cluster, we need to be able to set a unique name for each Pulumi resource.
"\(resourceName)-mc-sks-cluster": {
    type: "sks:Cluster"
    properties: {
        name:        resourceName
        description: "Minecraft Server"
        version:     sksVersion

    }
}
So to create the unique name, the interpolation syntax of CUE. "\(resourceName)-mc-sks-cluster" is the same as "server-1-mc-sks-cluster" if the resourceName is set to server-1.
In the whole schema definition we will find a lot of "\(resourceName)-..." strings.
Now we can head over to create our main CUE file. In this file we import the sks.cue file and define the servers
package main

import "exoscale.pulumi.com/minecraft/sks:sks"

servers: [ sks.#ExoscaleMinecraft & {
    resourceName:    "server-1"
    sksZone:         "de-fra-1"
    sksCNI:          "cilium"
    sksNodePoolSize: 3
    minecraftServerProperties: {
        type: "paper"
    }
},
    sks.#ExoscaleMinecraft & {
        resourceName:    "server-2"
        sksZone:         "de-fra-1"
        sksCNI:          "calico"
        sksNodePoolSize: 3
        minecraftServerProperties: {
            type: "paper"
        }
    },
]

for i, server in servers {
    variables: {
        server.variables
    }

    resources: {
        server.resources
    }

    outputs: {
        server.outputs
    }
}
In this file we define two servers. The first one is using Cilium as CNI and the second one is using Calico. Then we iterate over the servers and add the variables, resources and outputs to the main file.
Now we can run cue vet to validate the schema and pulumi up to deploy the stack.
cue vet .
Should not return any errors.
Export the Exoscale API key and secret as environment variables and run pulumi preview to see preview of all the resources that will be created.
export EXOSCALE_API_KEY=...
export EXOSCALE_API_SECRET=...
pulumi preview
You should see something like this, if you decided to create two servers:
pulumi preview
Previewing update (dev)

View Live: https://app.pulumi.com/engin/pulumi-exoscale/dev/previews/7d195809-3ab4-415a-8fcc-e24b72d31f63

     Type                                 Name                                                  Plan
 +   pulumi:pulumi:Stack                  pulumi-exoscale-dev                                   create
 +   ├─ exoscale:index:AntiAffinityGroup  server-1-mc-sks-anti-affinity-group                   create
 +   ├─ exoscale:index:SecurityGroup      server-1-mc-sks-security-group                        create
 +   ├─ exoscale:index:SKSCluster         server-1-mc-cluster                                   create
 +   ├─ exoscale:index:SecurityGroupRule  server-1-cilium-healthcheck-icmp-security-group-rule  create
 +   ├─ exoscale:index:SecurityGroupRule  server-1-minecraft-tcp-security-group-rule            create
 +   ├─ exoscale:index:SecurityGroupRule  server-1-nodeport-tcp-security-group-rule             create
 +   ├─ exoscale:index:SecurityGroupRule  server-1-nodeport-udp-security-group-rule             create
 +   ├─ exoscale:index:SecurityGroupRule  server-1-kubelet-security-group-rule                  create
 +   ├─ exoscale:index:SKSNodepool        server-1-mc-nodepool                                  create
 +   ├─ exoscale:index:SKSKubeconfig      server-1-mc-sks-kubeconfig                            create
 +   ├─ exoscale:index:SKSCluster         server-2-mc-cluster                                   create
 +   ├─ exoscale:index:AntiAffinityGroup  server-2-mc-sks-anti-affinity-group                   create
 +   ├─ exoscale:index:SecurityGroup      server-2-mc-sks-security-group                        create
 +   ├─ pulumi:providers:kubernetes       server-1-mc-k8s-provider                              create
 +   ├─ exoscale:index:SecurityGroupRule  server-2-kubelet-security-group-rule                  create
 +   ├─ exoscale:index:SecurityGroupRule  server-2-nodeport-tcp-security-group-rule             create
 +   ├─ exoscale:index:SecurityGroupRule  server-2-nodeport-udp-security-group-rule             create
 +   ├─ exoscale:index:SecurityGroupRule  server-2-cilium-healthcheck-icmp-security-group-rule  create
 +   ├─ exoscale:index:SecurityGroupRule  server-2-minecraft-tcp-security-group-rule            create
 +   ├─ exoscale:index:SKSNodepool        server-2-mc-nodepool                                  create
 +   ├─ exoscale:index:SKSKubeconfig      server-2-mc-sks-kubeconfig                            create
 +   ├─ exoscale:index:SecurityGroupRule  server-1-cilium-vxlan-security-group-rule             create
 +   ├─ exoscale:index:SecurityGroupRule  server-1-cilium-healthcheck-tcp-security-group-rule   create
 +   ├─ kubernetes:core/v1:Namespace      server-1-minecraft-namespace                          create
 +   ├─ exoscale:index:SecurityGroupRule  server-2-calico-vxlan-security-group-rule             create
 +   ├─ pulumi:providers:kubernetes       server-2-mc-k8s-provider                              create
 +   ├─ kubernetes:helm.sh/v3:Release     server-1-minecraft-chart                              create
 +   ├─ kubernetes:core/v1:Namespace      server-2-minecraft-namespace                          create
 +   └─ kubernetes:helm.sh/v3:Release     server-2-minecraft-chart                              create

Outputs:
    server-1-kubeconfig: [secret]
    server-2-kubeconfig: [secret]

Resources:
    + 30 to create
If everything looks good, run pulumi up to deploy the stack, the flags -f and -y can be used to YOLO the deployment without any confirmation and preview.
pulumi up -f -y
This could take a while, depending on the size of the node pools. Go grab a coffee or a beer, I'll wait!
Before we check if the Minecraft servers are up and running, let us check with the Exoscale CLI if the SKS cluster are up and running.
 exo compute sks list
┼──────────────────────────────────────┼─────────────────────┼──────────┼
│                  ID                  │        NAME         │   ZONE   │
┼──────────────────────────────────────┼─────────────────────┼──────────┼
│ 92de22f7-be0c-4324-aaba-ff35b072882a │ server-2-mc-cluster │ de-fra-1 │
│ f4331a42-7afc-4578-a897-98dc8b8c0669 │ server-1-mc-cluster │ de-fra-1 │
┼──────────────────────────────────────┼─────────────────────┼──────────┼
And let us look into the UI too, just to be sure:

Now let us check that the Minecraft servers are working correctly! We can run pulumi stack output to get the kubeconfig for each server.
pulumi stack output server-1-kubeconfig --show-secrets > exoscale-1.yaml
pulumi stack output server-2-kubeconfig --show-secrets > exoscale-2.yaml
Then we can use kubectl to check that the Minecraft server is running.
kubectl --kubeconfig exoscale-1.yaml get pods -n minecraft
And we should see something like this:
NAME                                  READY   STATUS    RESTARTS   AGE
minecraft-minecraft-b5d7587dc-s6tfx   1/1     Running   0          3m42s
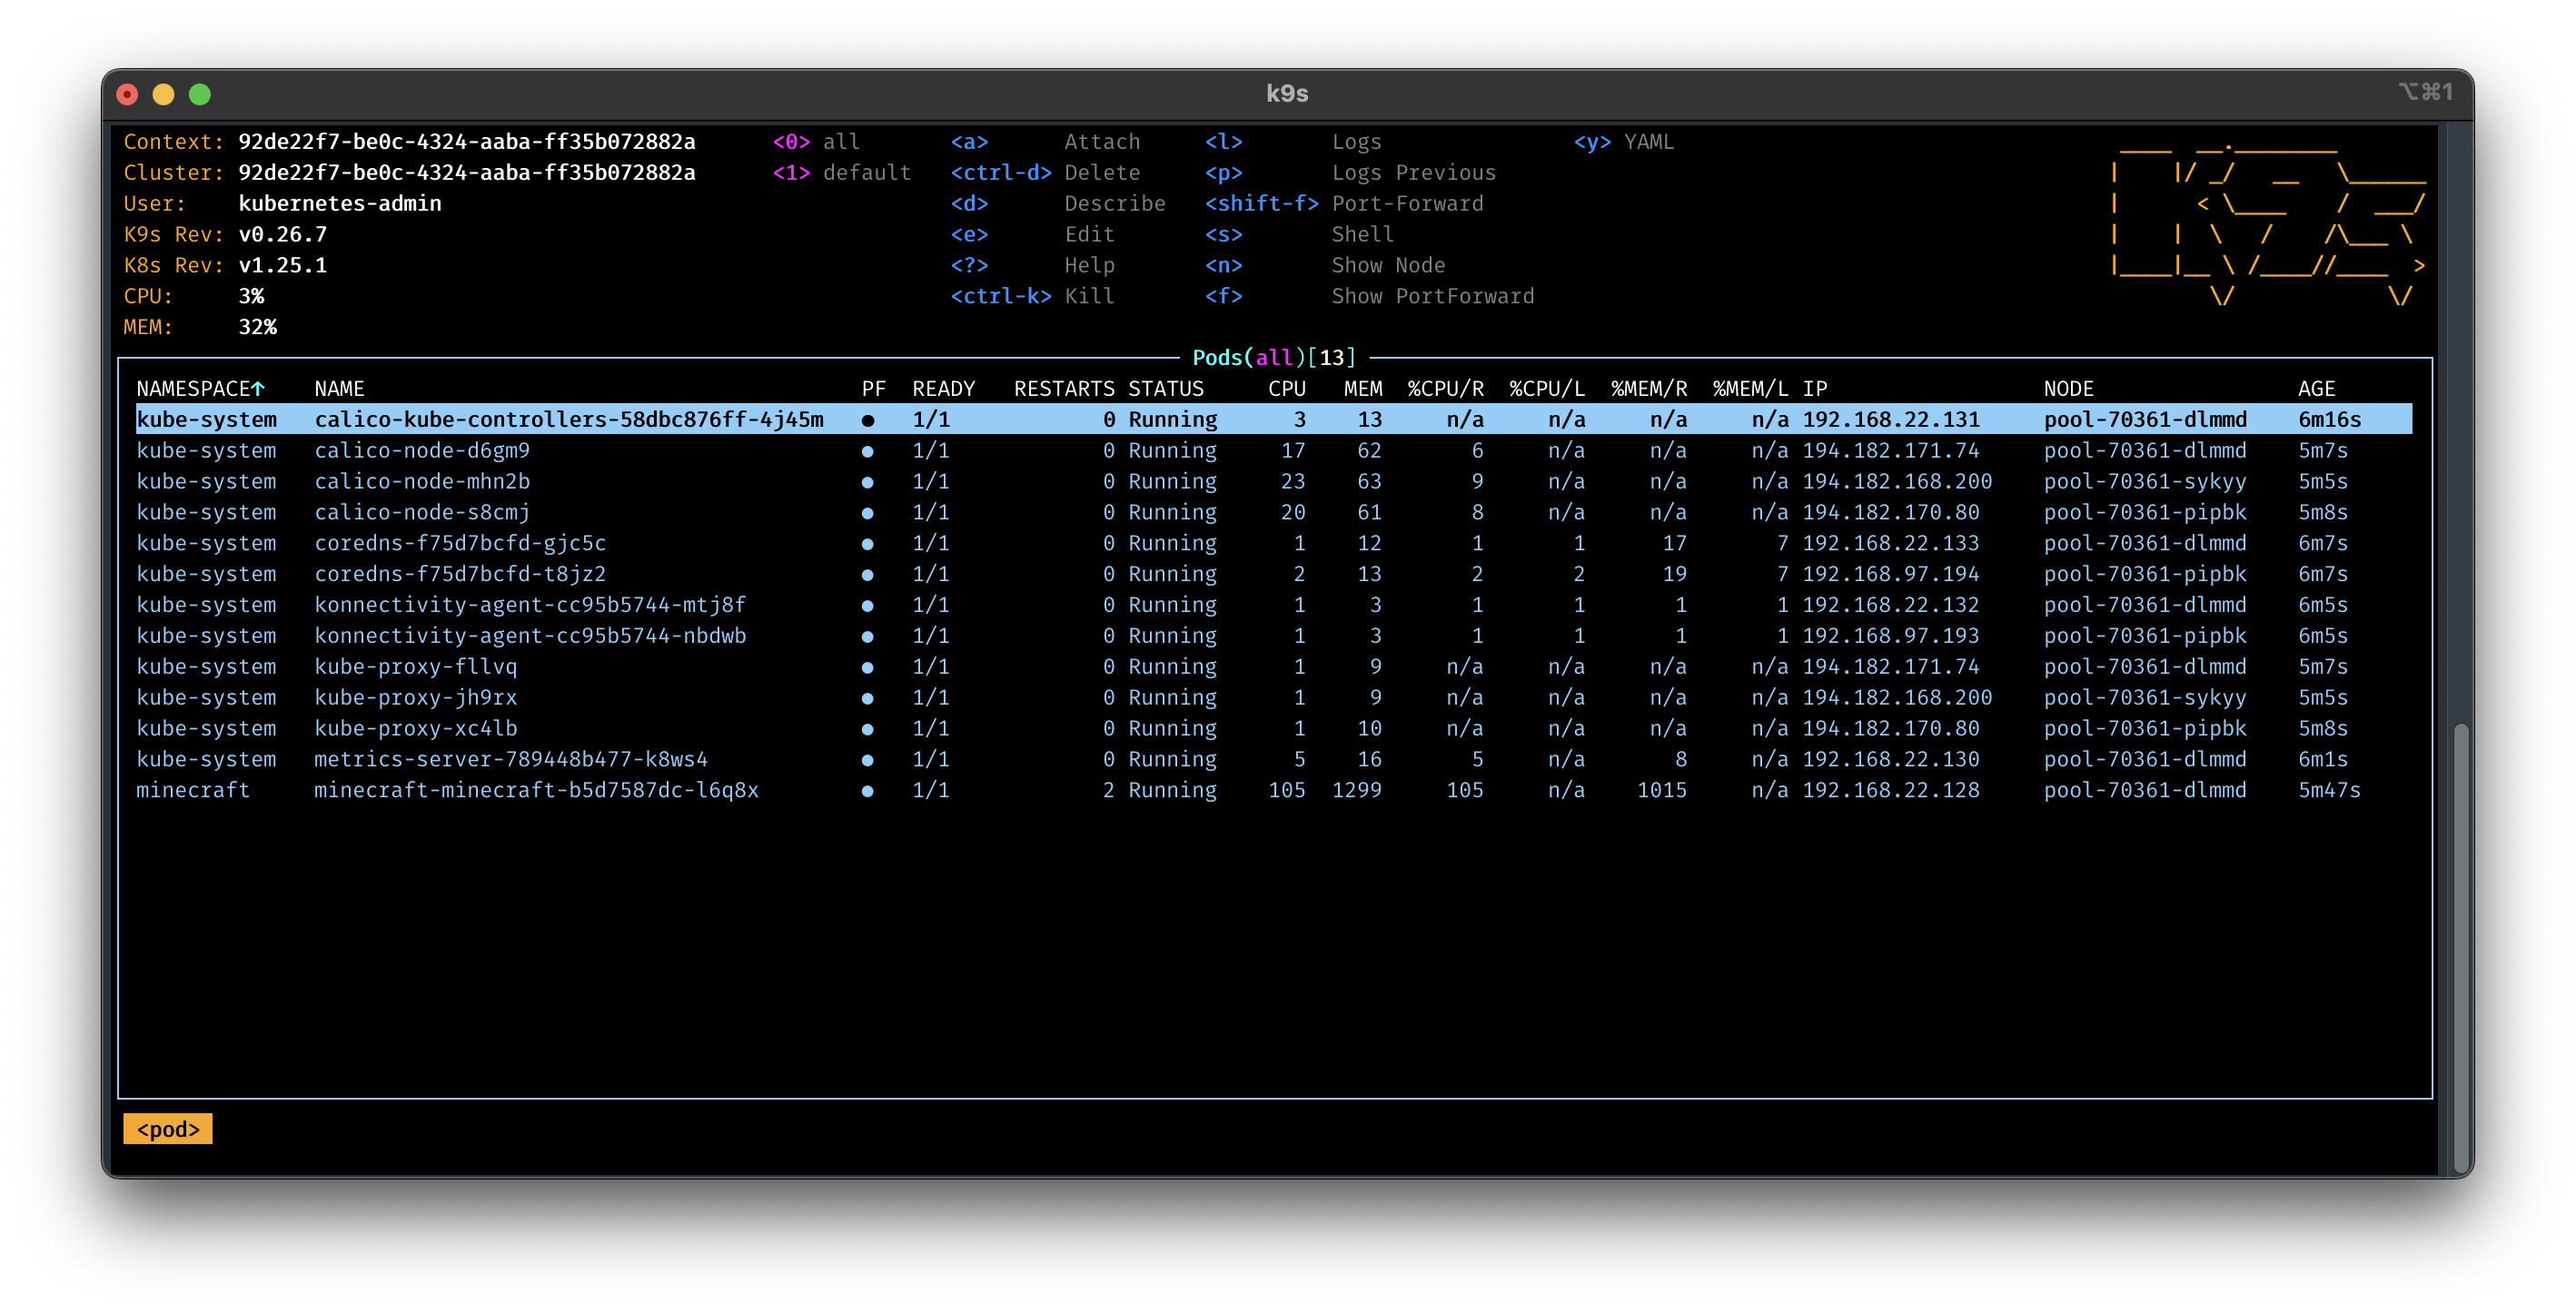
Or be lazy and use k9s to check the status of the pods.
k9s --kubeconfig exoscale-1.yaml
Play Minecraft
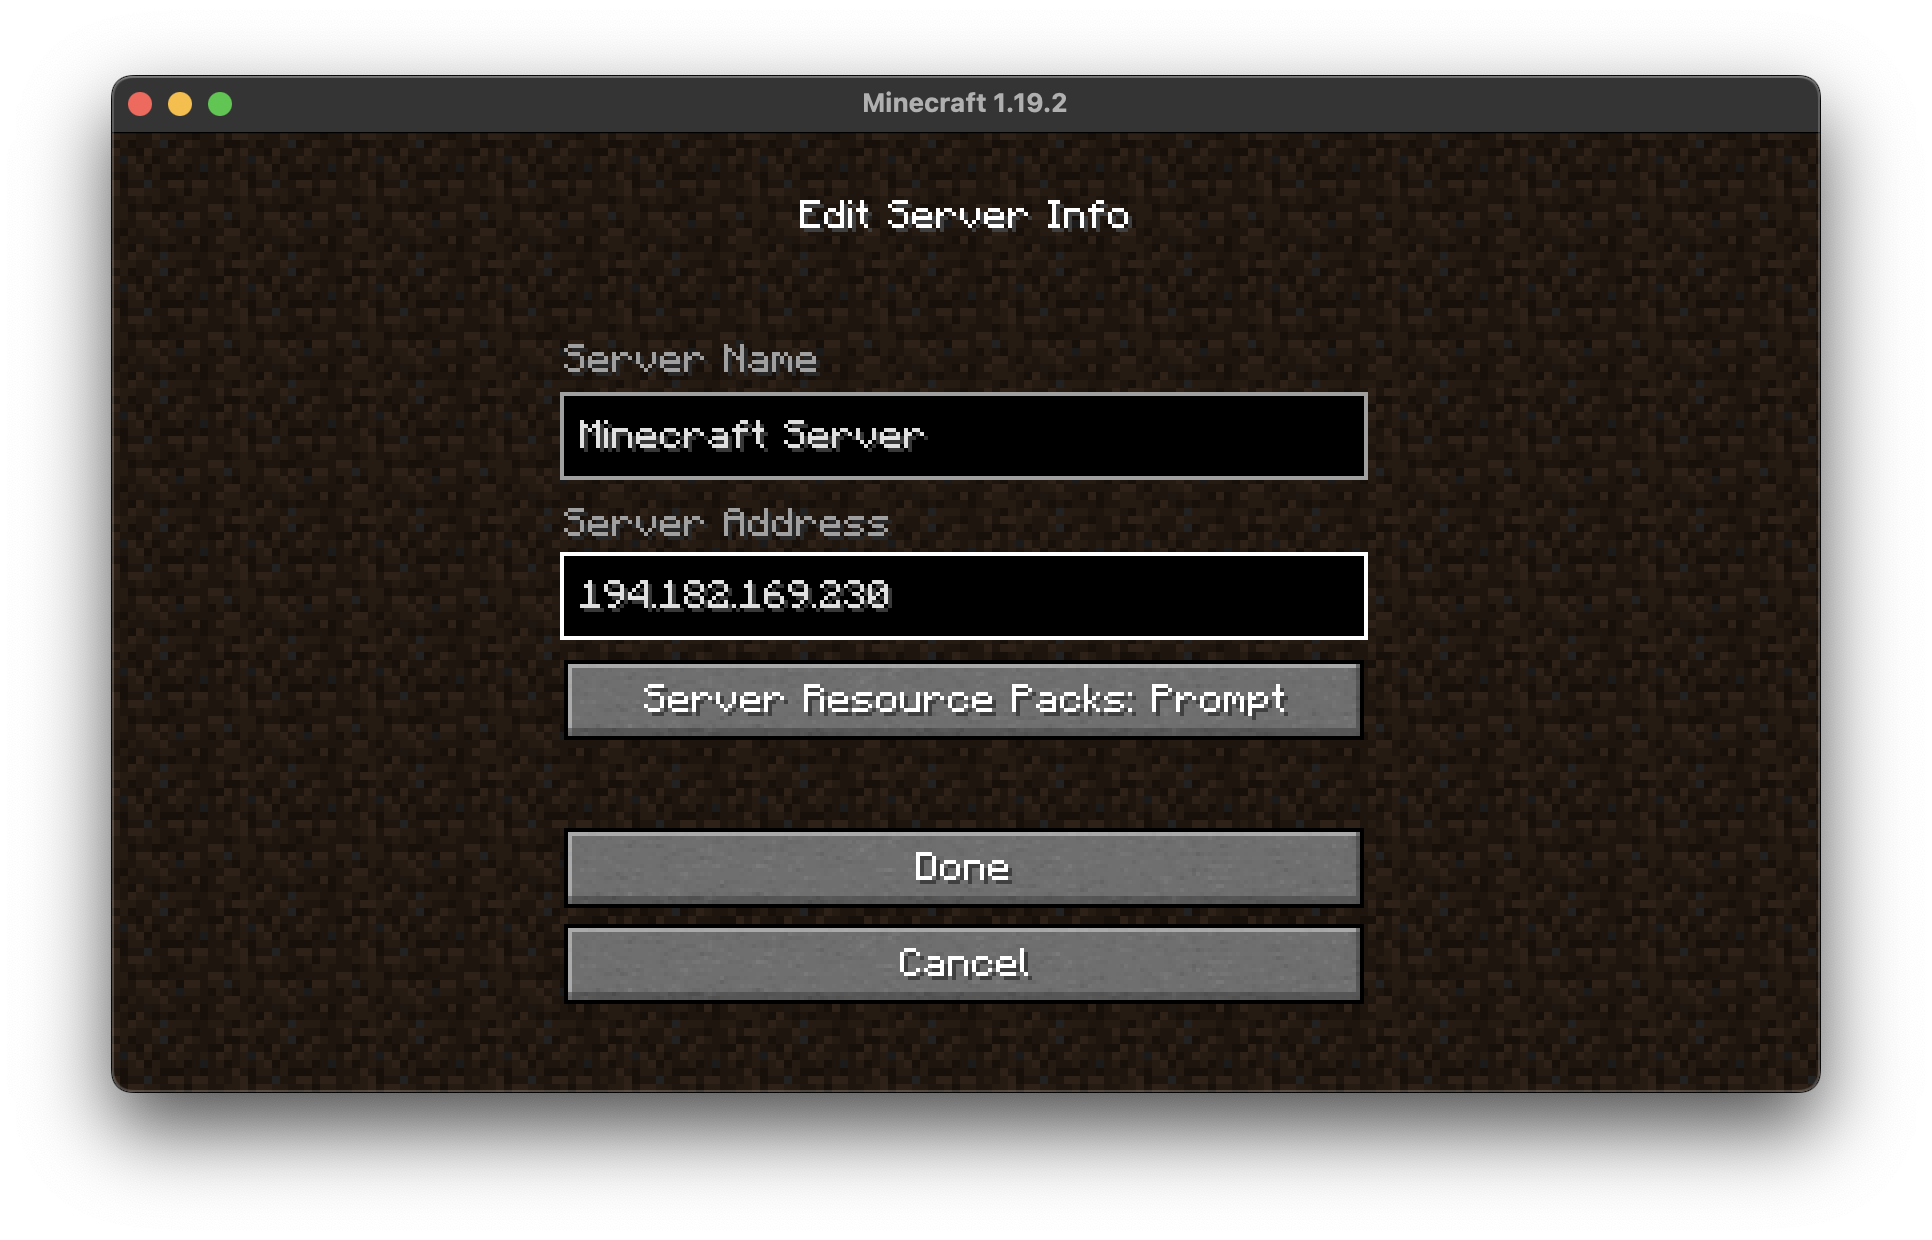
Of course, we can't play Minecraft without a client. You can download the client from the official website and connect to the server using the IP address of the load balancer.
kubectl --kubeconfig exoscale-1.yaml get svc -n minecraft
You should see something like this:
NAME                  TYPE           CLUSTER-IP      EXTERNAL-IP       PORT(S)           AGE
minecraft-minecraft   LoadBalancer   10.104.217.15   194.182.169.230   25565:30497/TCP   4m17s
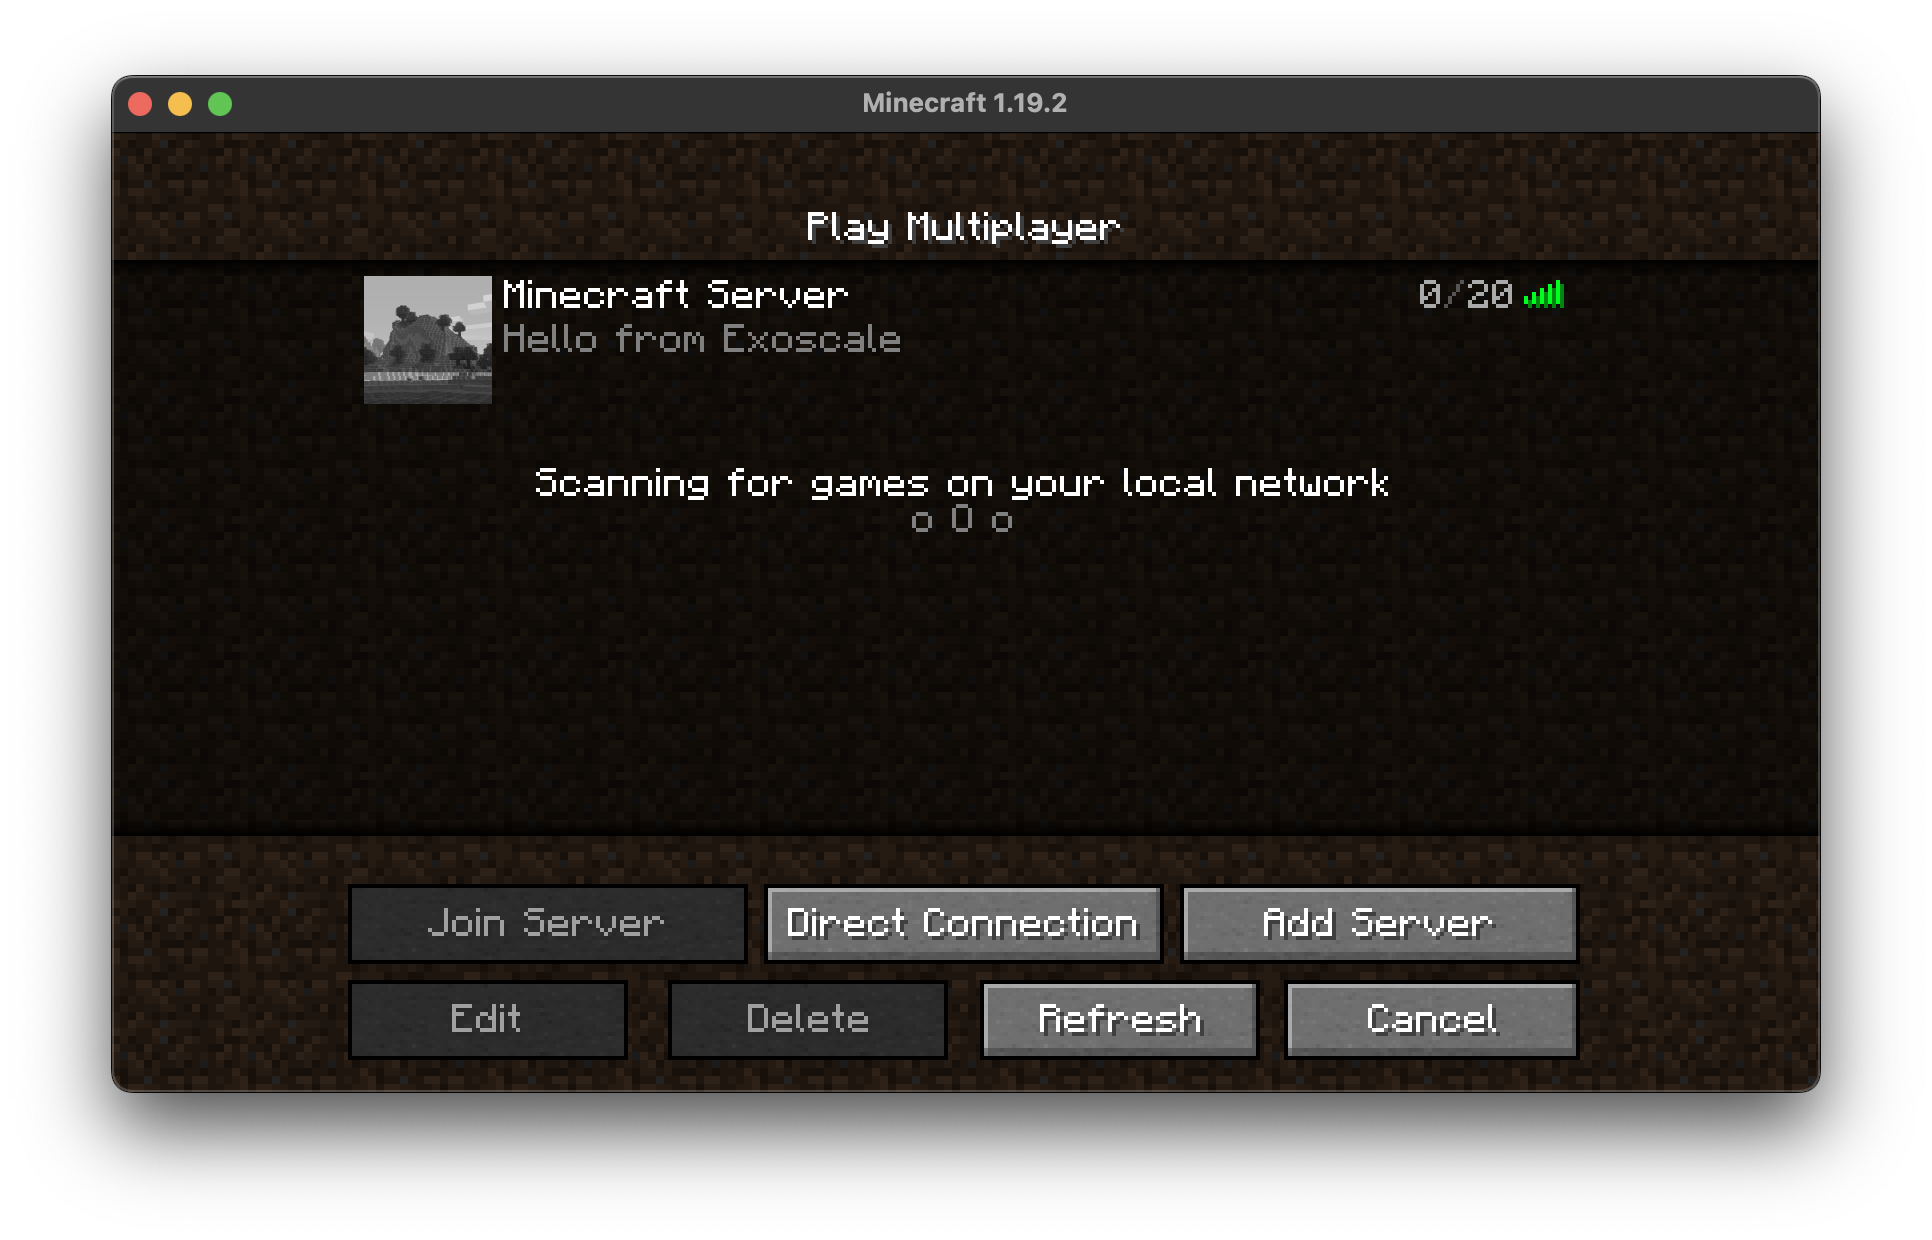
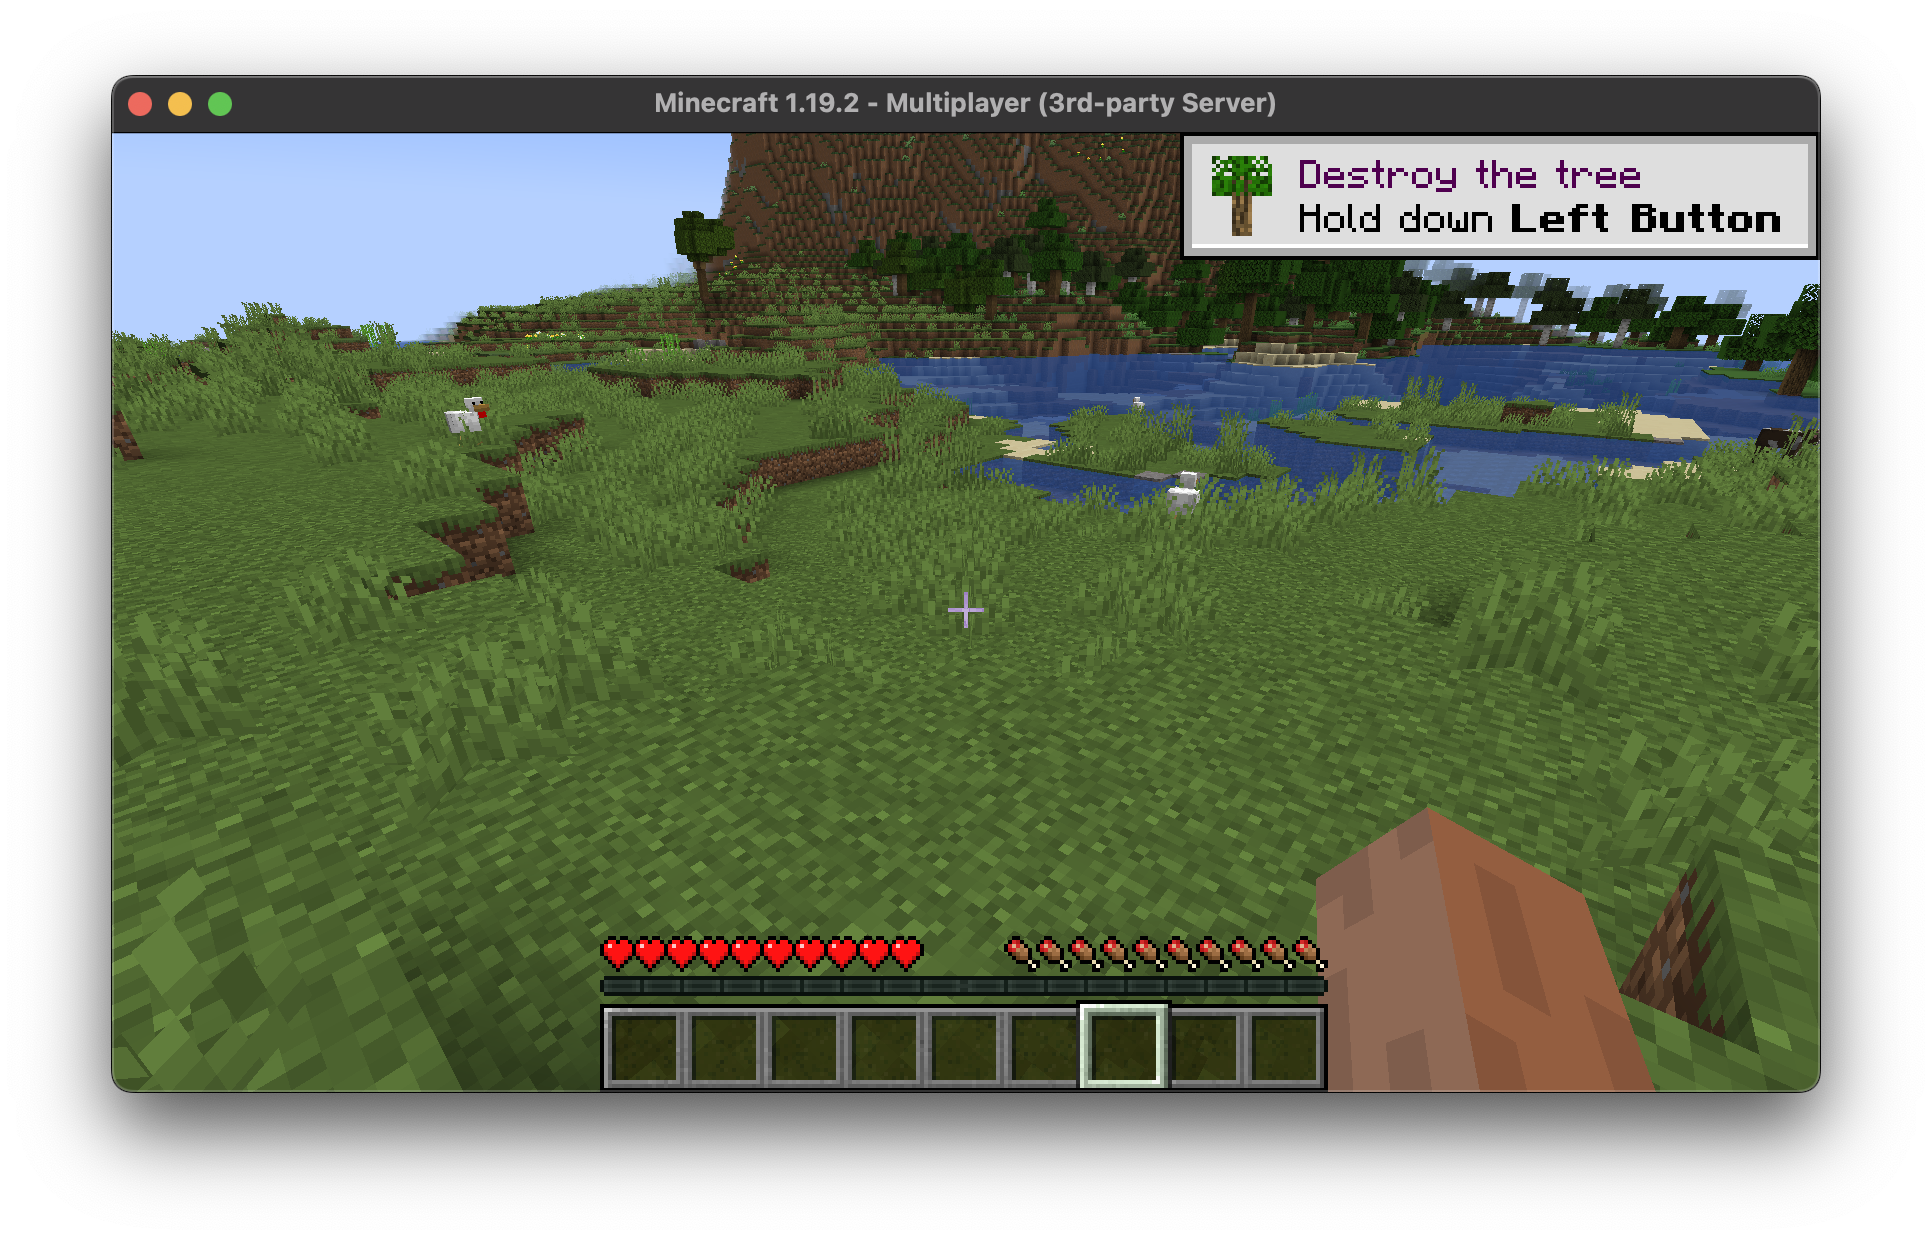
Now we can connect to the Minecraft server using the IP address of the load balancer.
Clean up
As always, don't forget to clean up after yourself. You can run pulumi destroy to delete the stack.
pulumi destroy -f -y
Wrapping up
In this tutorial, we have seen how to deploy a Minecraft server on Exoscale using Pulumi. We have also seen how to use CUE to generate the Pulumi code.
Additional resources
Feel free to browse the additional resources below to learn more about all the technologies and tools I used in this tutorial.


