How to build a Trivy plugin in Rust 🦀

E
Cloud Native Pilgrim | Kubernetes Enthusiast | Serverless Believer | Customer Experience Architect @ Pulumi | (he/him) | CK{A,AD} |
Search for a command to run...
Cloud Native Pilgrim | Kubernetes Enthusiast | Serverless Believer | Customer Experience Architect @ Pulumi | (he/him) | CK{A,AD} |
No comments yet. Be the first to comment.
Discover the power of Rust - the modern systems programming language - through my insightful blog series. Dive deep into its features, benefits, and examples.
The impatient way
GPU scheduling in Kubernetes has always felt like buying a mansion when you need a studio apartment. A small inference workload that needs 2GB of GPU memory gets scheduled on an entire 80GB A100, and there's nothing you can do about it. The device pl...

TL;DR: The code https://github.com/dirien/quick-bites Nothing is more controversial in the Kubernetes community than whether to use Helm or Kustomize. I always advocate the philosophy of using the right tool for the right job. It avoids the problem...

TL;DR Le code https://github.com/dirien/quick-bites Introduction This article is part three of my series on secret management on Kubernetes with the help of Pulumi. In my first article, we talked about the Sealed Secrets controller. The second arti...

With AWS Lambda

Disaster Recovery, Data Migration made easy!

In this blog article, we're going to build a Trivy plugin using Rust 🦀. The functionality of the plugin itself is pretty basic: It contains a simple terminal user interface (TUI) to display the results of a Trivy image scan.
The main motivation of this blog article, is to show how to put the learnings of my last articles into a real-world scenario. We will use jReleaser again, to create our release and upload the binaries to GitHub.
Feel free to read the blog, as we are not dig so deep into the details of jReleaser.
We're going to use also an external library called tui-rs to create the UI. And of course most Rust 🦀 language elements.
Check my blog, to build up an basic understanding of the most common language elements of Rust 🦀
Be sure that you have the following tools installed and configured:
Trivy plugin?Trivy at all?Trivy (tri pronounced like trigger, vy pronounced like envy) is a simple and comprehensive
vulnerability/misconfiguration/secret scanner for containers and other artifacts developed by Aqua Security.
To know more about Trivy, I highly recommend to check following videos and of course
the official documentation.
Or follow the Anaïs on Twitter:
Trivy plugins?Trivy provides a plugin feature to allow others to extend the Trivy CLI without the need to change the Trivy code base. This plugin system was inspired by the plugin system used in kubectl, Helm, and Conftest.
Trivy installation without impacting the core Trivy tool.Trivy, and will show up in Trivy help and subcommands.A plugin can be installed using the trivy plugin install command. This command takes a url and will download the plugin and install it in the plugin cache.
tui-rsOn of the major parts of this plugin is the terminal user interface. We will use the tui-rs library to create our TUI in the plugin. The library is very easy to use and provides a lot of out of the box widgets to create a nice looking TUI.
I used the lazytrivy from Owen Rumney as a starting point for the TUI. Lazytrivy is a wrapper for Trivy that allows you to run Trivy without remembering the command arguments and renders everything nicely in a TUI.
BTW, lazytrivy is written in Go, so nice to rebuild some parts in
Rust🦀 with this plugin.
Let us jump straight into the code. We will create a new Rust 🦀 project with the following command:
cargo init
And add the following dependencies to the Cargo.toml file:
cargo add tui
cargo add serde_json
cargo add serde
cargo add clap
The tui library is the main library we will use to create the TUI. The serde_json and serde libraries are used to parse the JSON output of Trivy. And the clap library is used to parse the command line arguments.
Underneath the src directory I created the main.rs and some additional Rust 🦀 files to keep the code clean and readable.
Let us take a look into some parts of the Rust 🦀 files, as we can not cover the whole code in this blog article.
trivy.rs fileThe task of the trivy.rs file is to execute the Trivy CLI and parse the JSON output.
The output of the command is passed to the serde library to parse the JSON into a struct. The struct is defined in the trivy.rs file as well.
pub fn trivy(image_name: &str) -> Trivy {
    // setup terminal
    let mut cmd = Command::new("trivy");
    let list = cmd.arg("image").arg(image_name)
        .arg("--format").arg("json")
        .output();

    let object: Trivy;
    match list {
        Ok(out) => match String::from_utf8(out.stdout) {
            Ok(data) => {
                object = serde_json::from_str(&data.as_str()).unwrap();
            }
            Err(_) => unreachable!("No panic happens in this block"),
        }
        Err(_) => unreachable!("No panic happens in this block"),
    }
    object
}
As you can see, we only check for container image vulnerabilities. Feel free to add more scan options.
cli.rs fileThe cli.rs file contains the code to handle all the command line releated task. To keep our life simple, we use the clap library.
In the main function, we parse the arguments and pass the image name to the trivy.rs file to run the Trivy CLI.
In the code, we define the argument structure:
#[derive(Parser, Debug)]
#[command(author = "Engin Diri", version, long_about = None)]
/// A simple tui Trivy plugin written in Rust
pub struct Args {
    #[arg(short, long)]
    pub image_name: String,
}
And parse the arguments and pass it to the trivy command with the following code:
let args = Args::parse();
let object = trivy::trivy( & args.image_name);
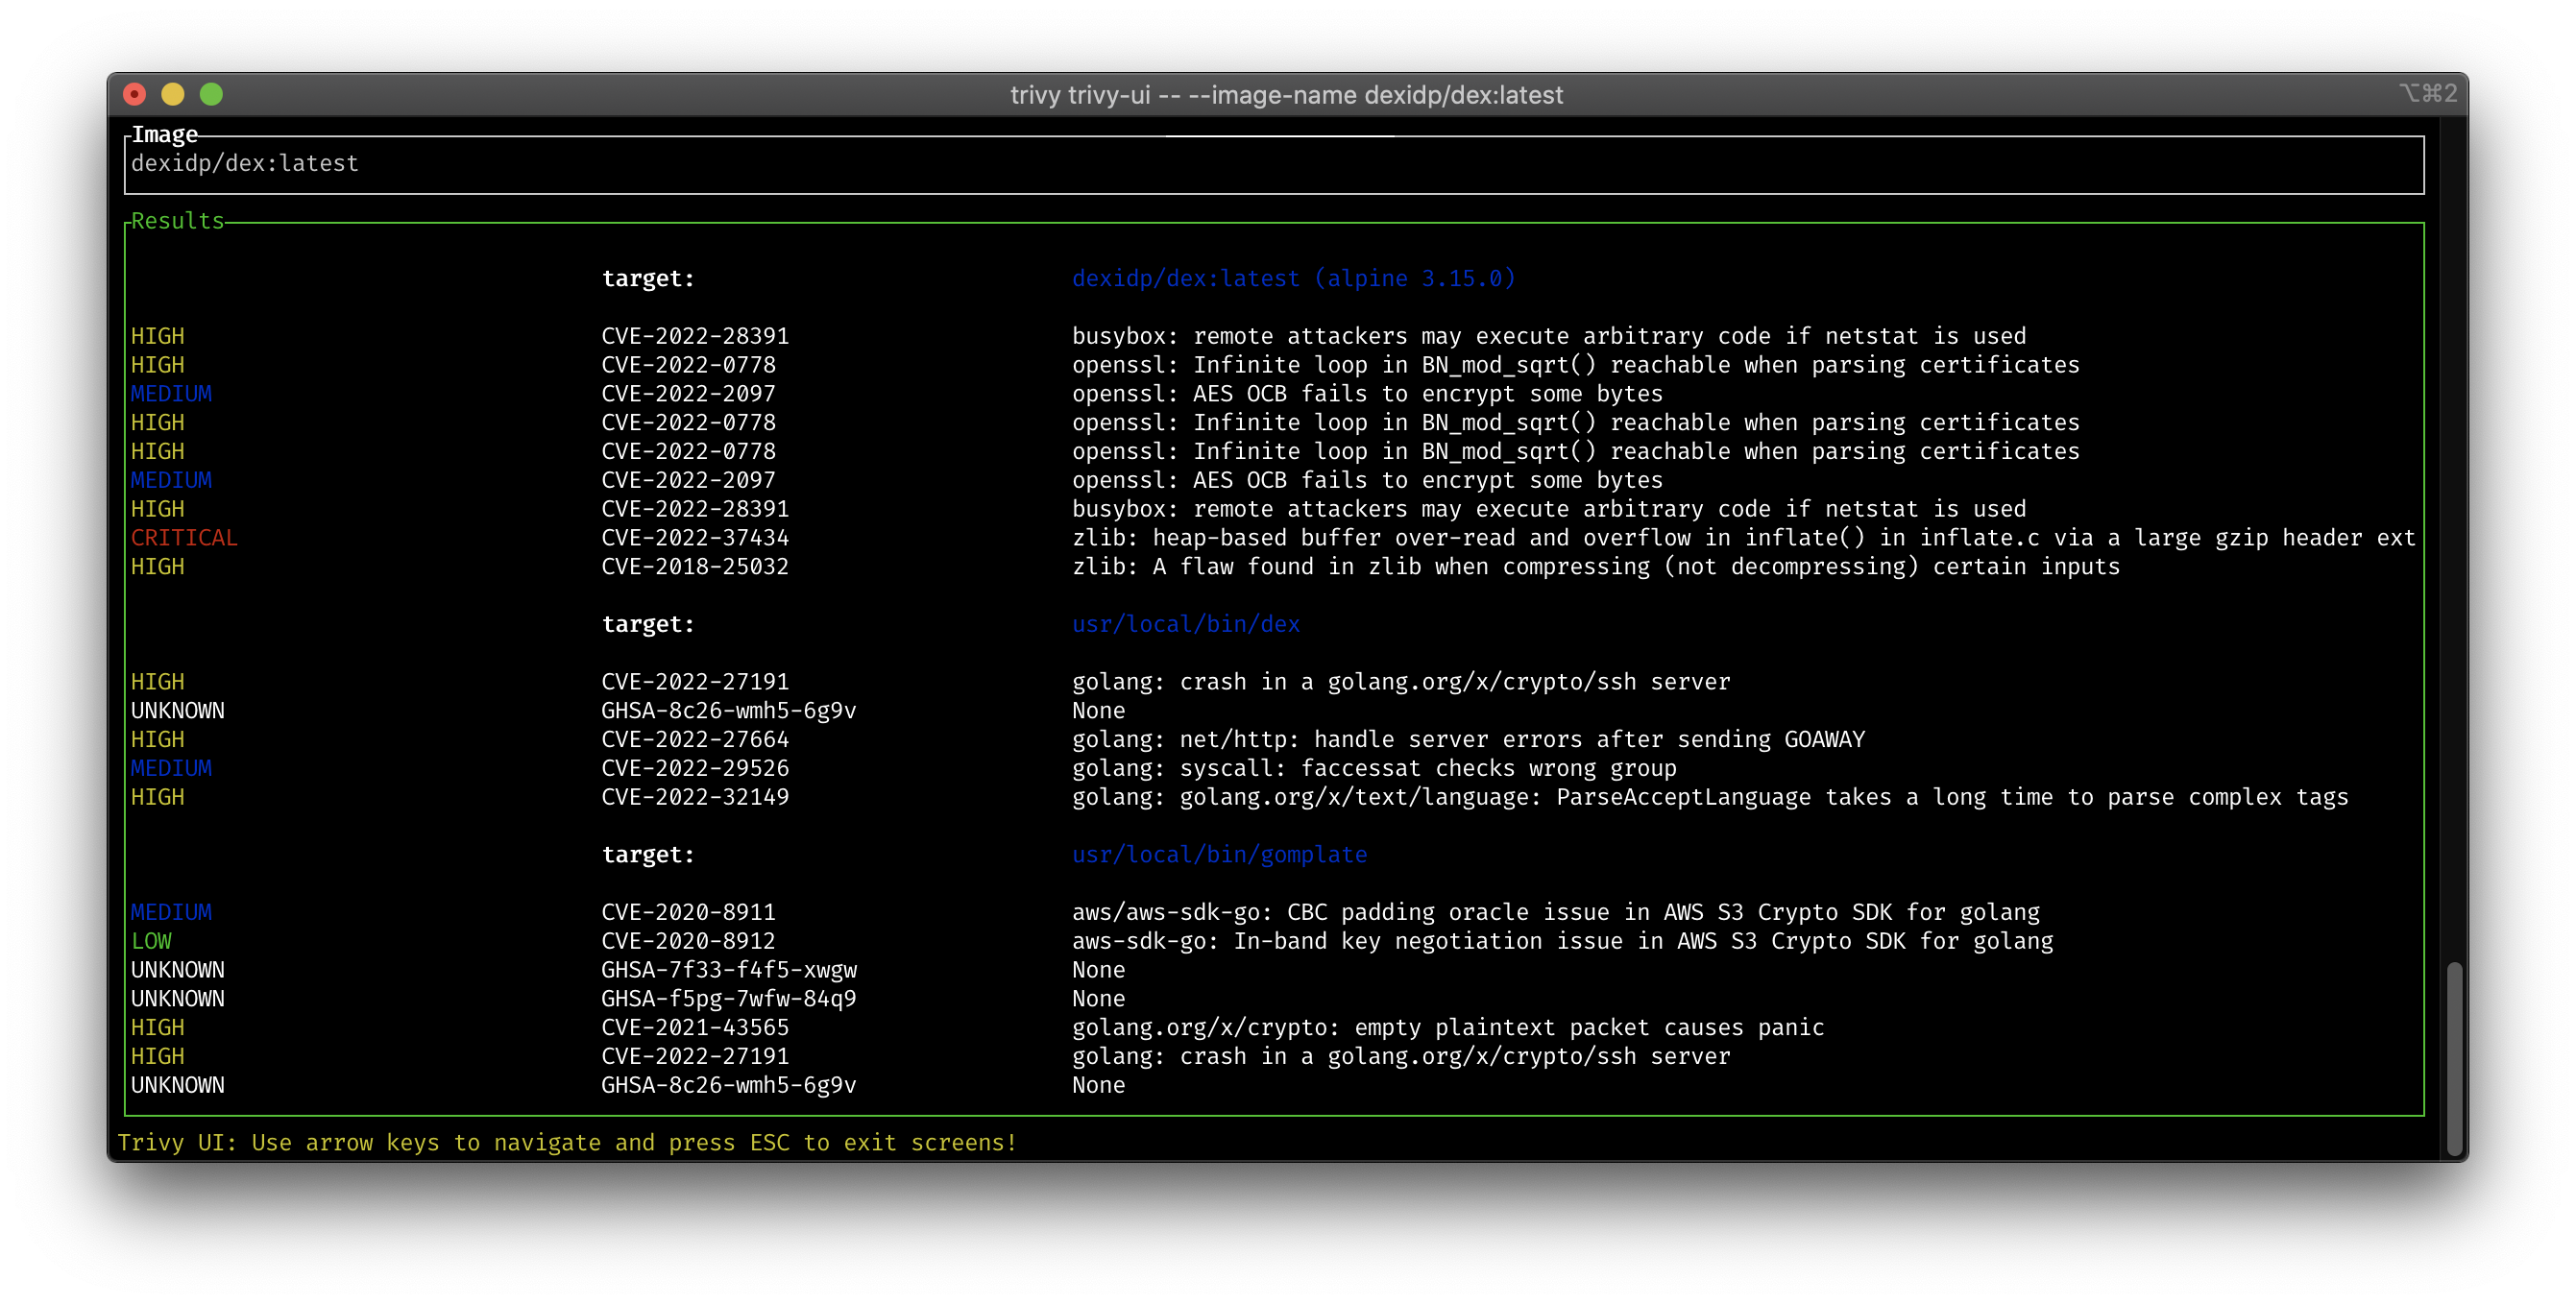
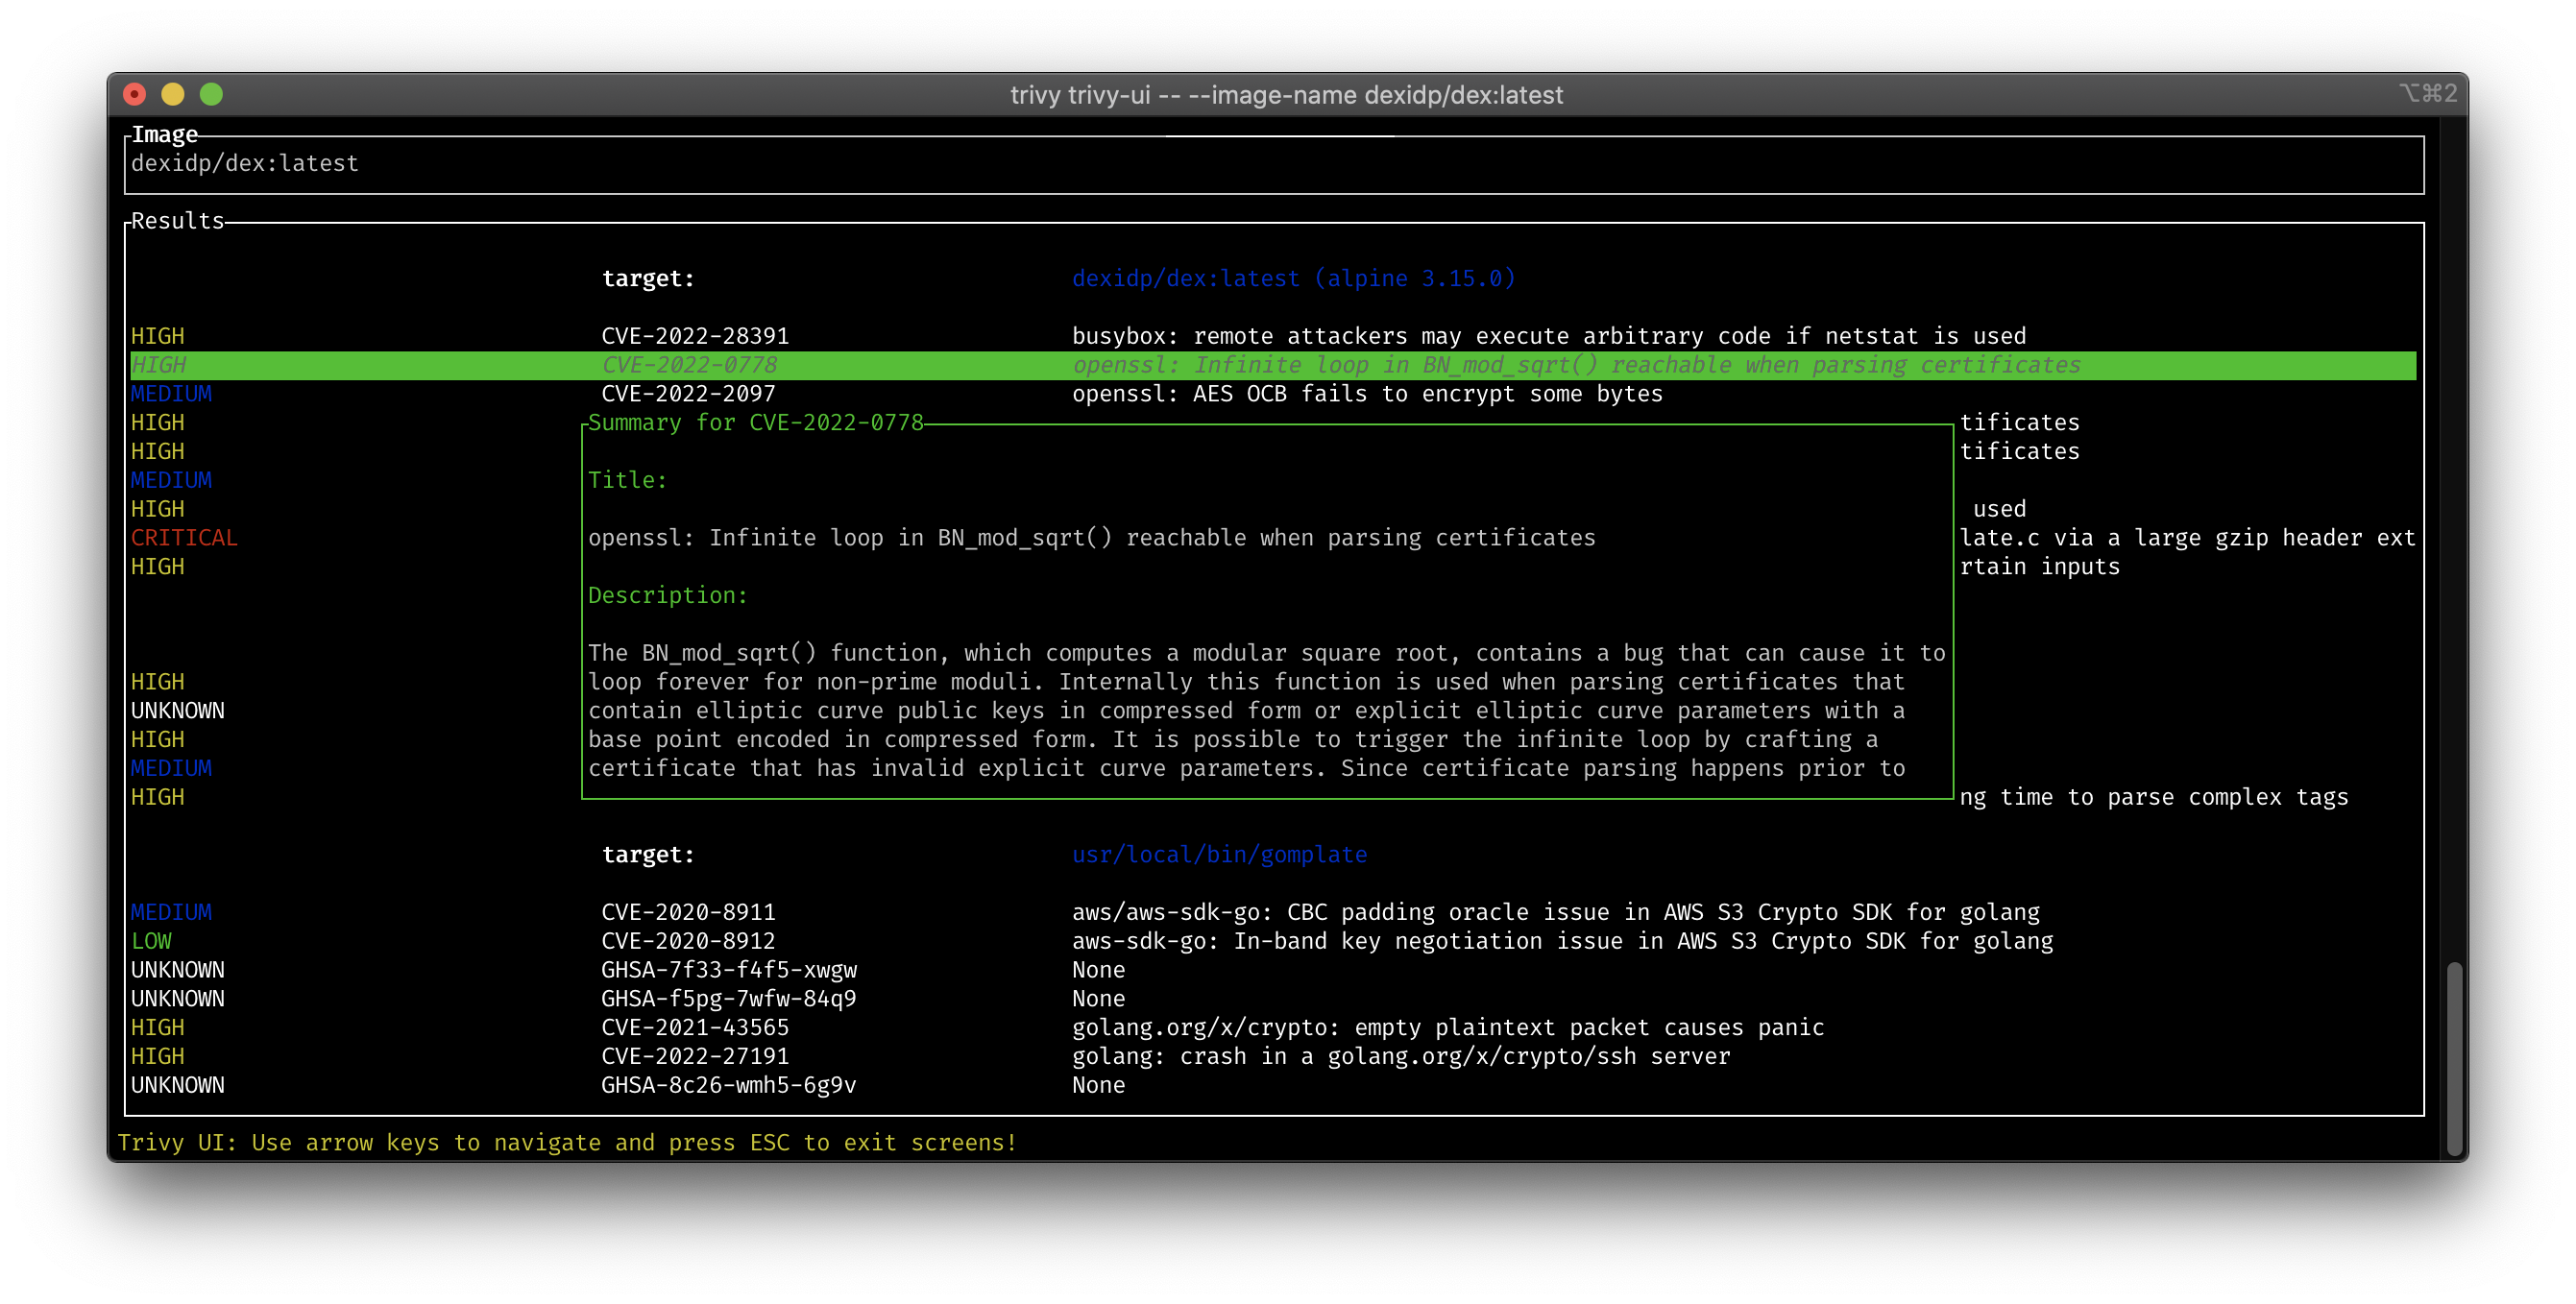
ui.rs fileIn the ui.rs file, we create the TUI. The TUI consists of a table with the vulnerabilities. If you press the enter key on a vulnerability, the details of the vulnerability are shown in a new popup window.
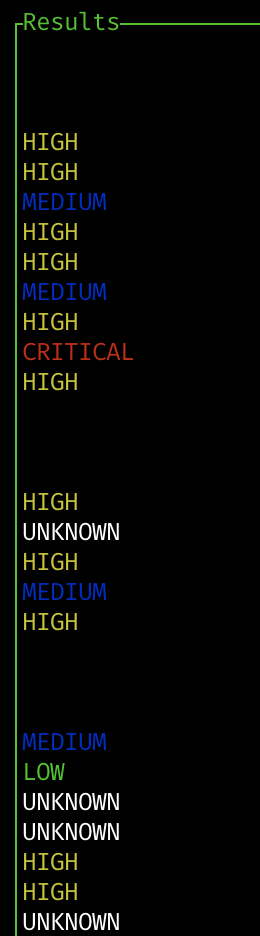
The table with the vulnerabilities also has some styling. The vulnerabilities are colored based on the severity of the vulnerability.
pub fn critical_color(crtical: String) -> Style {
    return if crtical == "CRITICAL" {
        Style::default().fg(Color::Red)
    } else if crtical == "HIGH" {
        Style::default().fg(Color::Yellow)
    } else if crtical == "MEDIUM" {
        Style::default().fg(Color::Blue)
    } else if crtical == "LOW" {
        Style::default().fg(Color::Green)
    } else {
        Style::default().fg(Color::White)
    };
}

The creation of the rows of the table is done with the following code:
for i in &app.trivy.results {
    match &i.vulnerabilities {
        Some(vul) => {
            rows.push((Row::new(vec![
                Span::styled("", Style::default()),
            ]), std::ptr::null()));
            rows.push((Row::new(vec![
                Span::styled("", Style::default()),
                Span::styled("target: ", Style::default().fg(Color::White).add_modifier(Modifier::BOLD)),
                Span::styled(i.target.clone(), Style::default().fg(Color::Blue)),
            ]), std::ptr::null()));
            rows.push((Row::new(vec![
                Span::styled("", Default::default()),
            ]), std::ptr::null()));
            for j in vul {
                rows.push((Row::new(vec![
                    Cell::from(j.severity.clone().unwrap_or("None".to_string())).style(lib::critical_color(j.severity.clone().unwrap_or("None".to_string()))),
                    Cell::from(j.vulnerability_id.clone().unwrap_or("None".to_string())).style(Style::default().fg(Color::White)),
                    Cell::from(j.title.clone().unwrap_or("None".to_string())).style(Style::default().fg(Color::White)),
                ]), j));
            }
        }
        _ => {}
    }
}
The interaction with the TUI is done with the following code:
if let Event::Key(key) = event::read()? {
    match key.code {
    KeyCode::Char('q') => {
    if app.show_popup {
      app.pop_scroll = 0;
      app.show_popup = false;
    } else {
      return Ok(());
    }
  }
  KeyCode::Esc => {
    if app.show_popup {
      app.pop_scroll = 0;
      app.show_popup = false;
    } else {
      return Ok(());
    }
  }
  KeyCode::Down => {
    if app.show_popup {
      app.pop_scroll += 1;
    } else {
      app.next();
    }
  }
  KeyCode::Up => {
    if app.show_popup {
      if app.pop_scroll > 0 {
        app.pop_scroll -= 1;
      }
    } else {
      app.previous();
    }
  }
  KeyCode::Enter => app.show_popup = !app.show_popup,
          _ => {}
  }
}
Here is a screenshot of the TUI:

plugin.yamlA Trivy plugin has a top-level directory, and then a plugin.yaml file.
The core of a plugin is a simple YAML file named plugin.yaml. Here is the content of the plugin.yaml file:
name: "trivy-ui"
repository: github.com/dirien/trivy-plugin-ui
version: "0.1.0"
usage: trivy ui -- --image-name <image-name>
description: |-
  A Trivy plugin that displays the vulnerabilities in a TUI.
  Usage: trivy ui -- --image-name <image-name>
platforms:
  - selector:
      os: linux
      arch: amd64
    uri: https://github.com/dirien/trivy-plugin-ui/releases/download/v0.1.0/ui-0.1.0-linux-amd64.tar.gz
    bin: ./ui
  - selector:
      os: darwin
      arch: amd64
    uri: https://github.com/dirien/trivy-plugin-ui/releases/download/v0.1.0/ui-0.1.0-darwin-amd64.tar.gz
    bin: ./ui
The plugin.yaml field should contain the following information:
name: The name of the plugin. This also determines how the plugin will be made available in the Trivy CLI. (
required)version: The version of the plugin. (required)usage: A short usage description. (required)description: A long description of the plugin. This is where you could provide a helpful documentation of your
plugin. (required)platforms: (required)selector: The OS/Architecture specific variations of a execution file. (optional)os: OS information based on GOOS (linux, darwin, etc.) (optional)arch: The architecture information based on GOARCH (amd64, arm64, etc.) (optional)uri: Where the executable file is. Relative path from the root directory of the plugin or remote URL such as HTTP
and
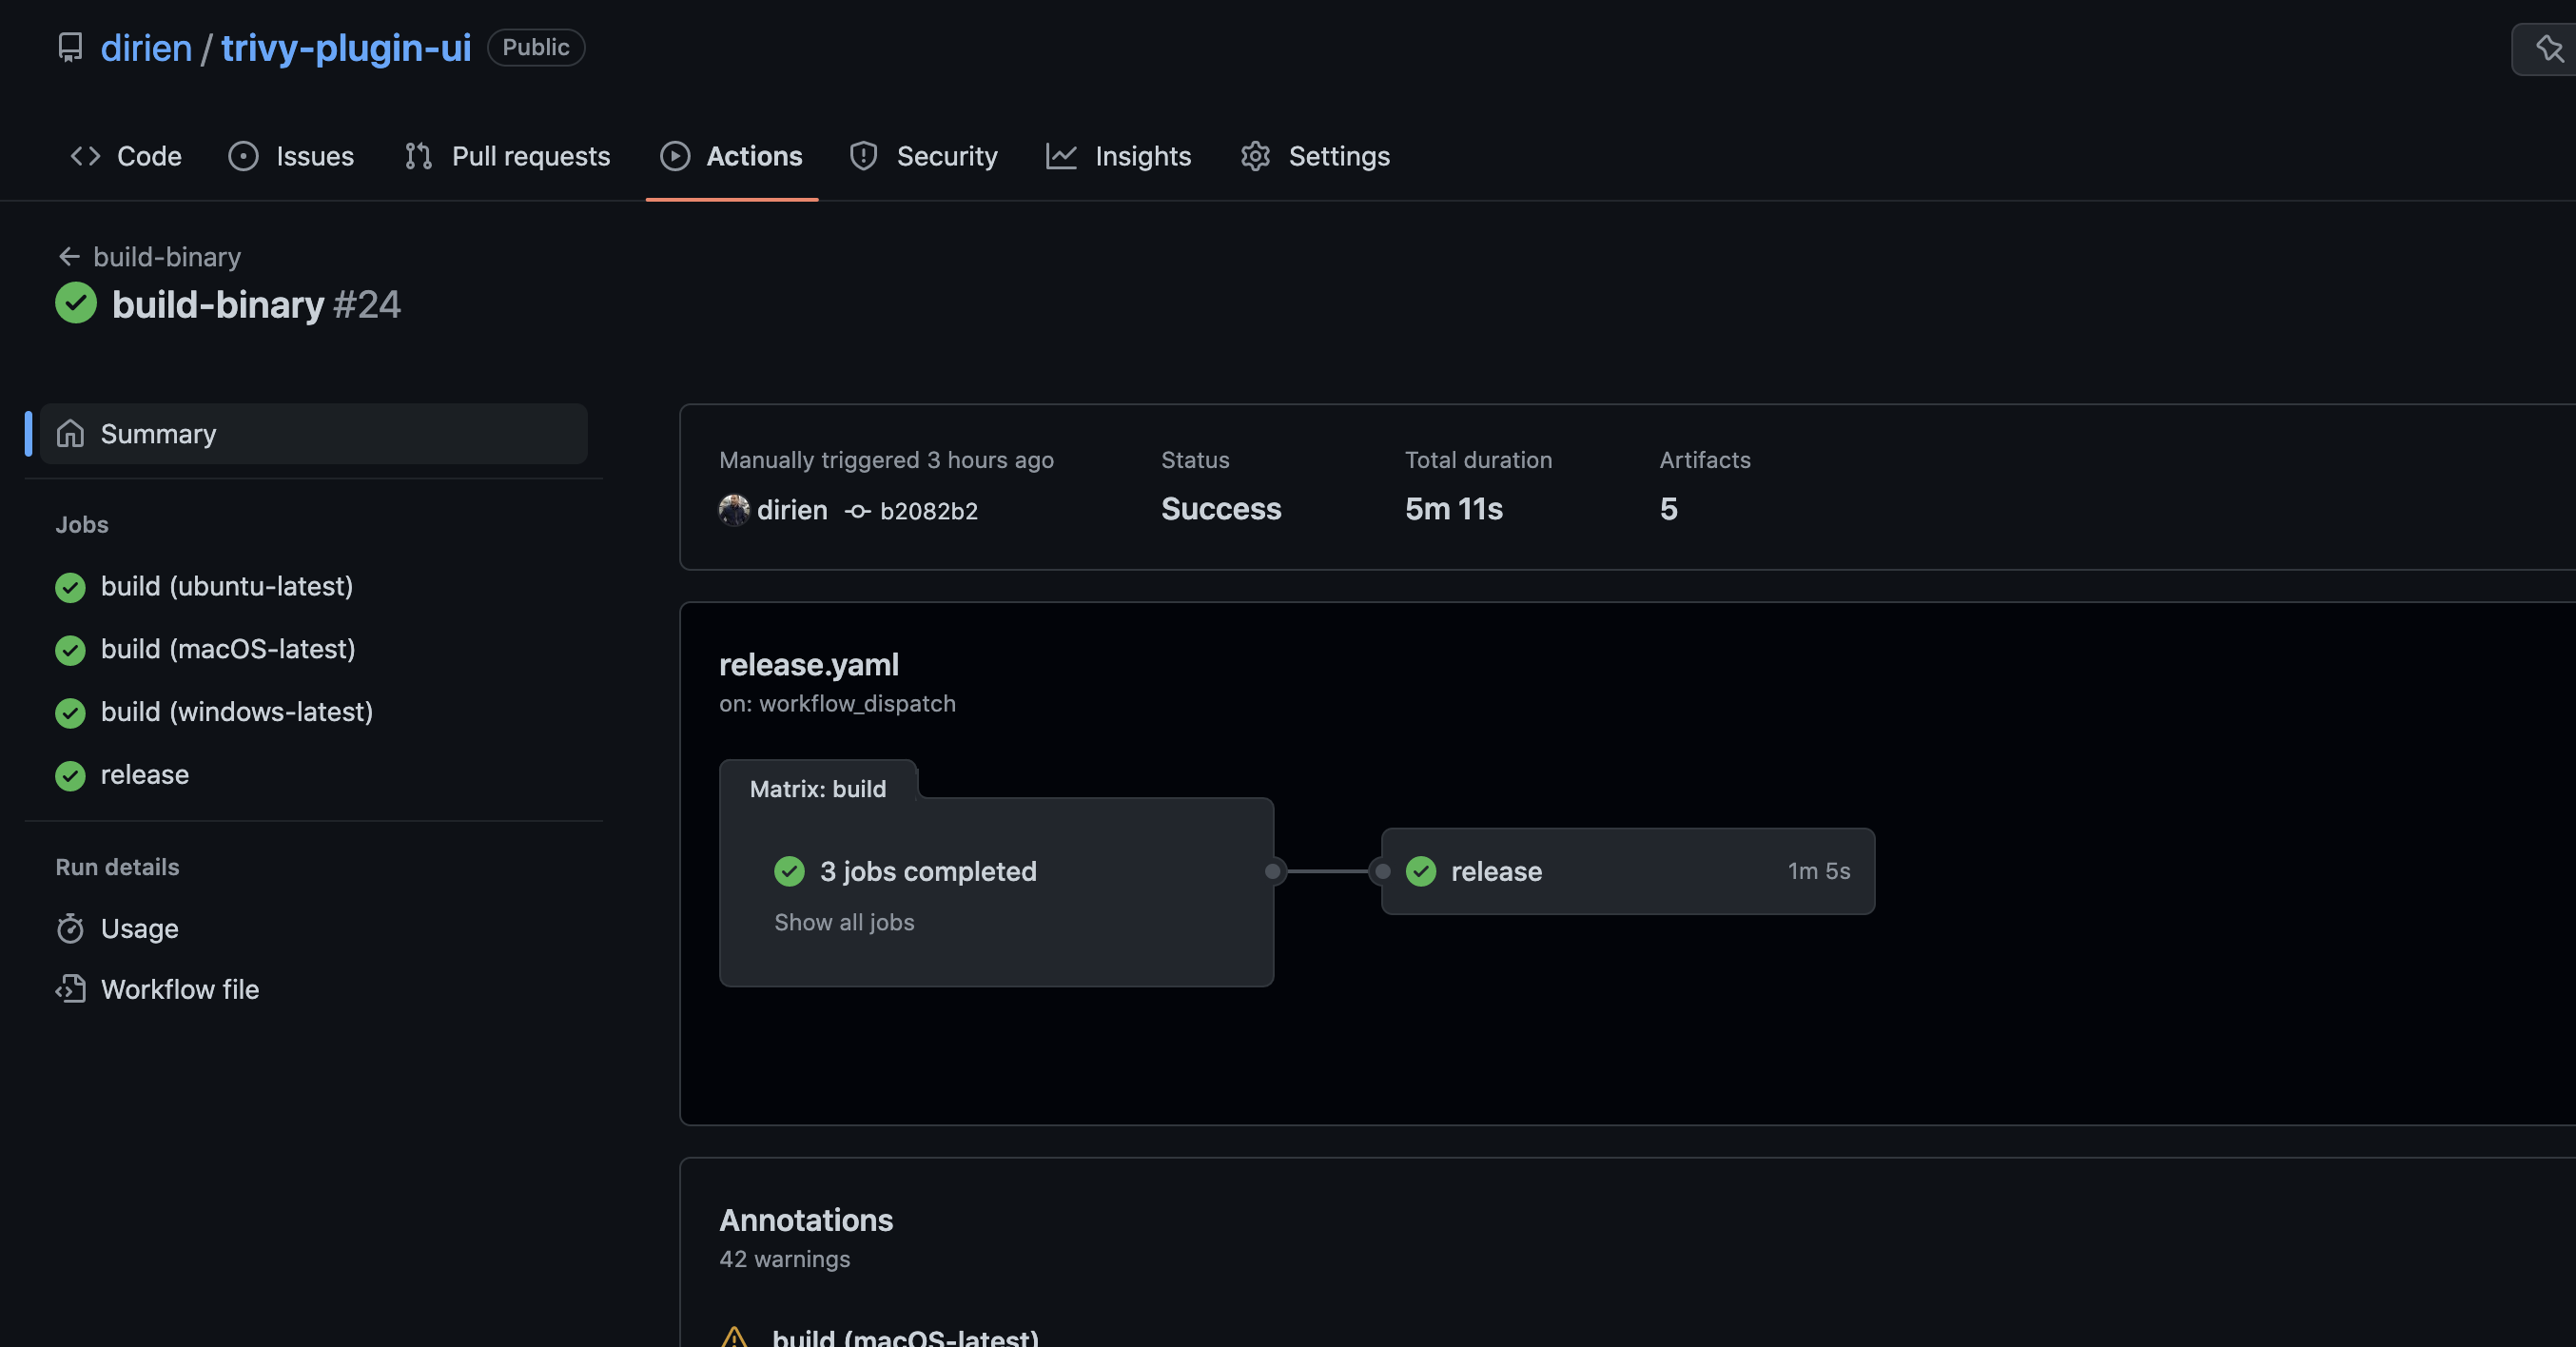
S3. (required)bin: Which file to call when the plugin is executed. Relative path from the root directory of the plugin. (required)jReleaserTo create the release, we use the jReleaser tool. Please check my previous blog post on how to use jReleaser to create a release.
The jReleaser configuration file is the following:
project:
  name: ui
  version: 0.1.0
  description: A simple tui Trivy plugin written in Rust
  authors:
    - Engin Diri
  license: Apache-2.0
  inceptionYear: 2022

environment:
  properties:
    artifactsDir: out/jreleaser/assemble/ui/archive

platform:
  replacements:
    'osx-x86_64': 'darwin-amd64'
    'linux-x86_64': 'linux-amd64'
    'windows-x86_64': 'windows-amd64'

assemble:
  archive:
    ui:
      active: ALWAYS
      formats: [ TAR_GZ ]
      attachPlatform: true
      fileSets:
        - input: 'target/release'
          includes: [ 'ui{.exe,}' ]
        - input: '.'
          includes: [ 'LICENSE' ]

distributions:
  ui:
    type: BINARY
    executable:
      windowsExtension: exe
    artifacts:
      - path: '{{artifactsDir}}/{{distributionName}}-{{projectVersion}}-darwin-amd64.tar.gz'
        platform: 'osx-x86_64'
      - path: '{{artifactsDir}}/{{distributionName}}-{{projectVersion}}-linux-amd64.tar.gz'
        platform: 'linux-x86_64'
      - path: '{{artifactsDir}}/{{distributionName}}-{{projectVersion}}-windows-amd64.tar.gz'
        platform: 'windows-x86_64'

release:
  github:
    owner: dirien
    name: trivy-plugin-ui
    skipTag: false
    draft: false
    update:
      enabled: true
      sections:
        - ASSETS
        - TITLE
        - BODY
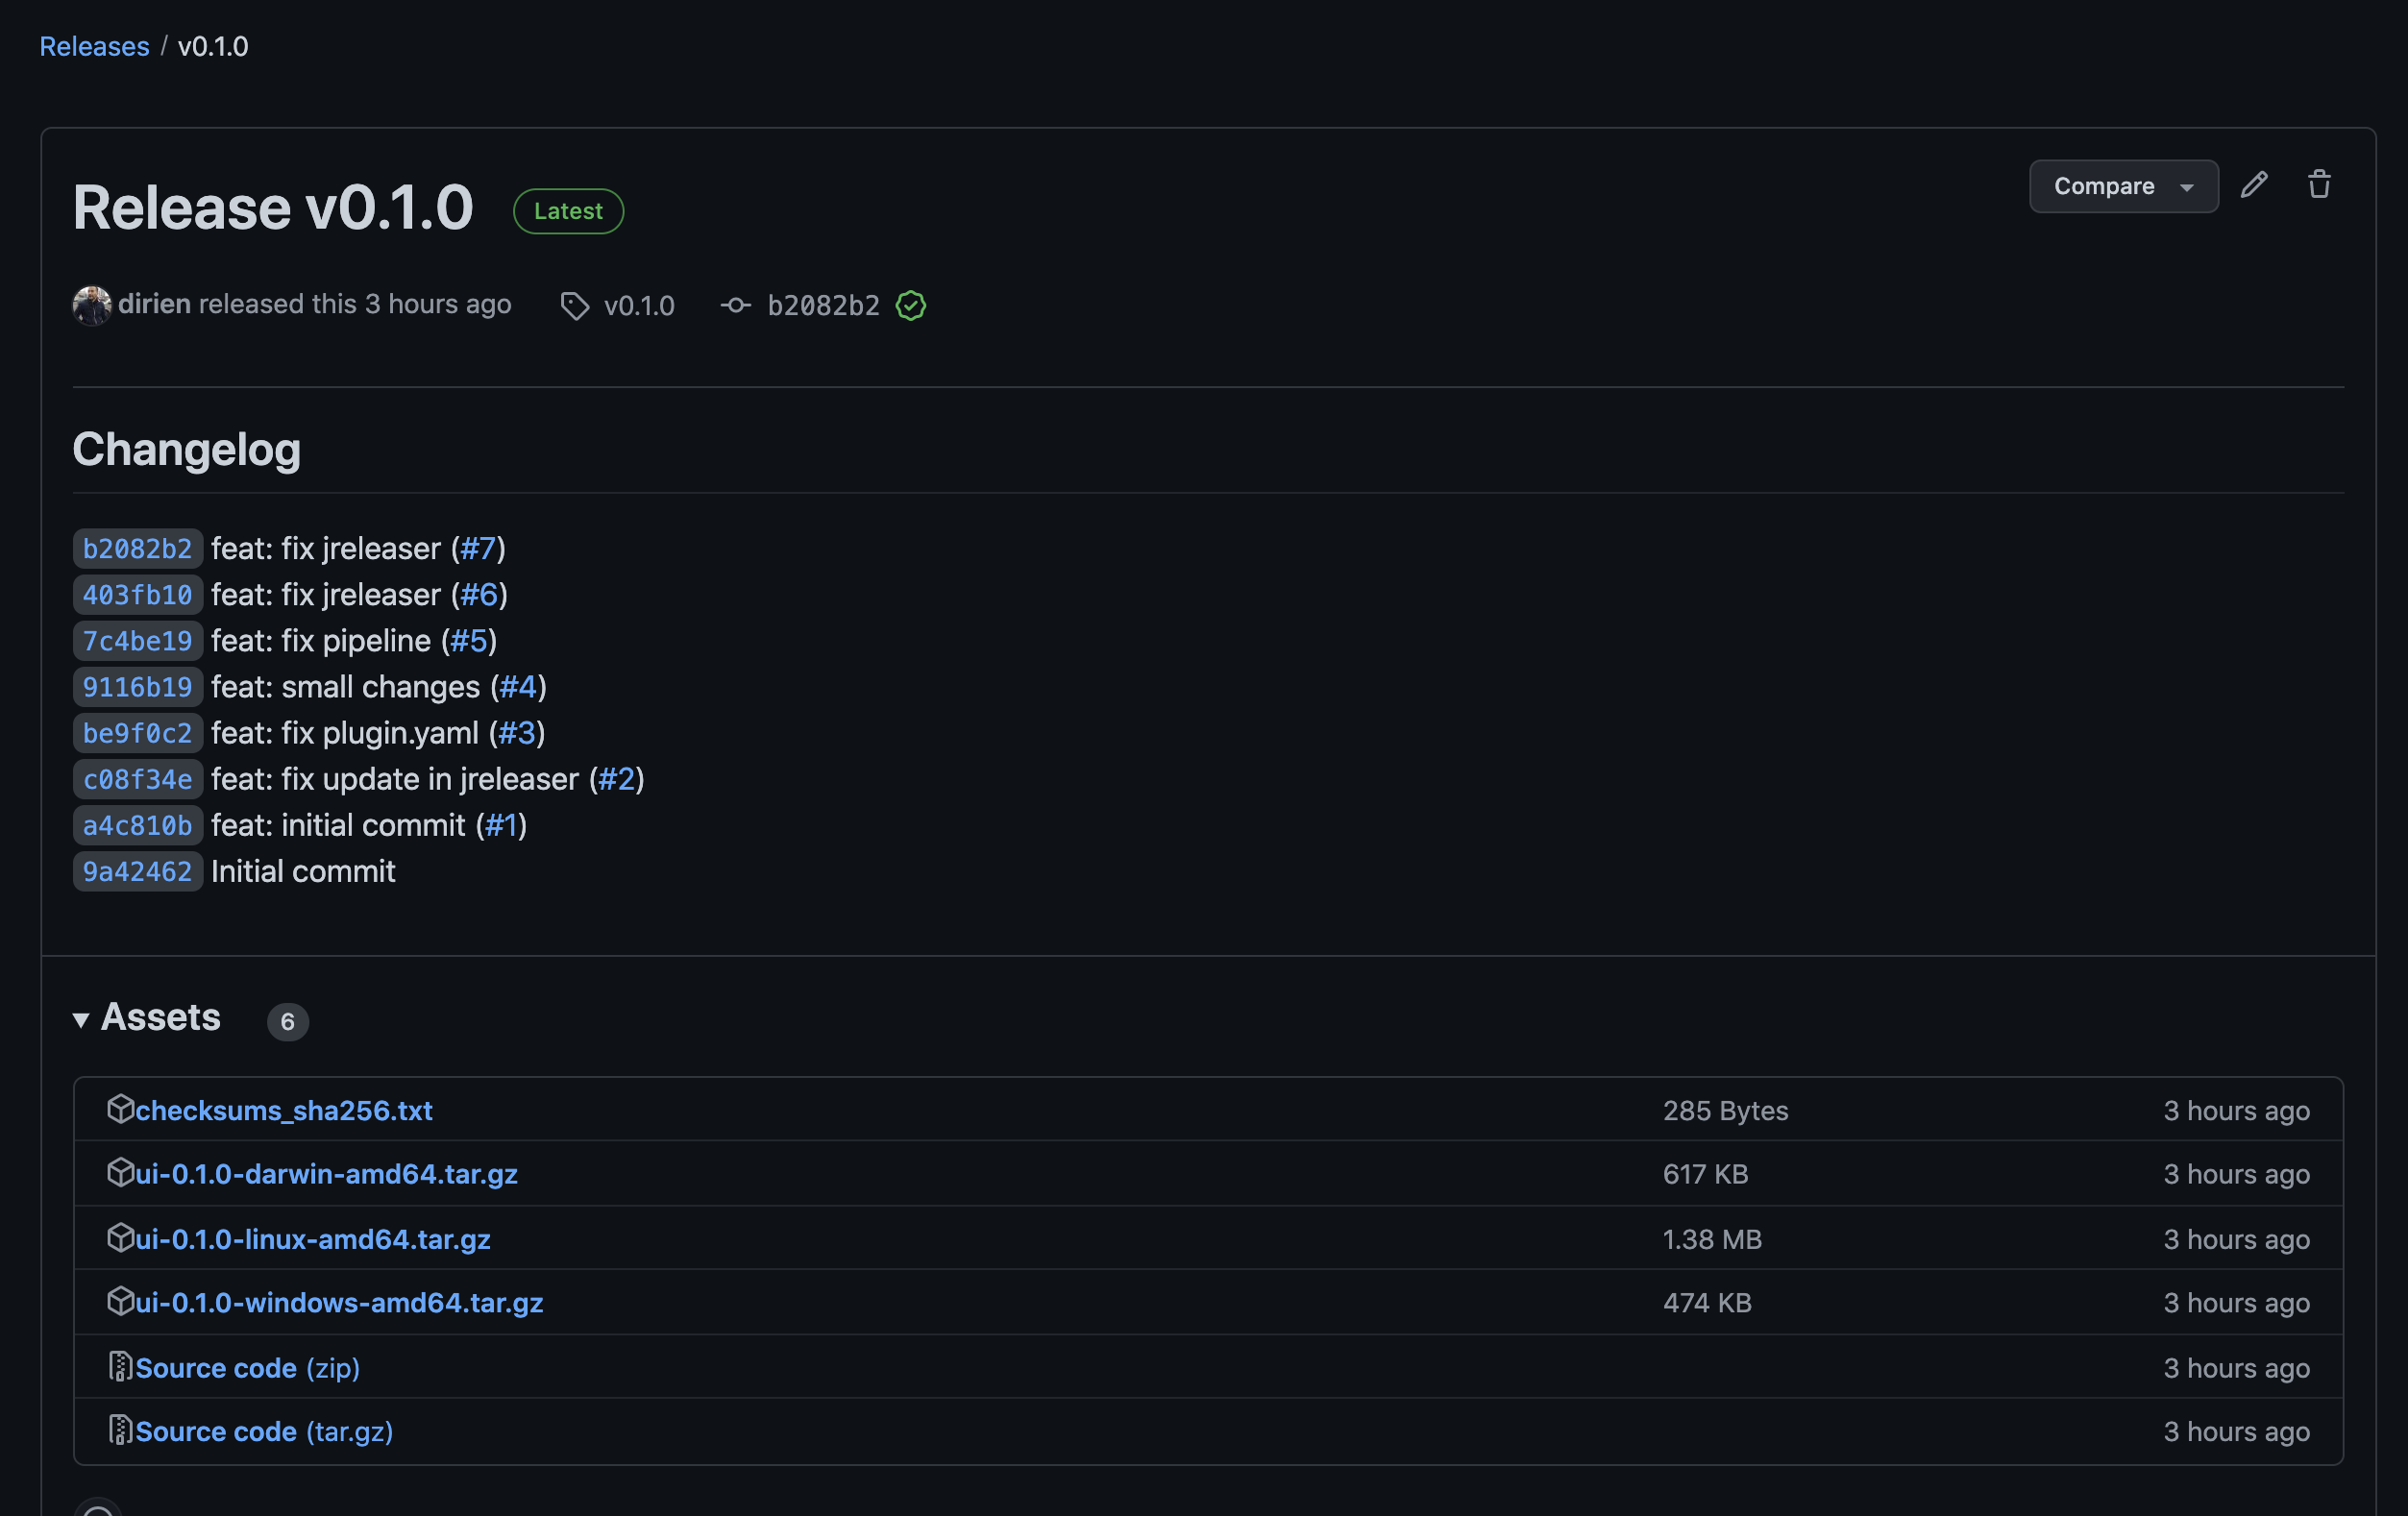
Now, with everything in place, we can create our release in GitHub.
Under the Releases tab, you should see the v0.1.0 release:
Let's install the plugin:
trivy plugin install github.com/dirien/trivy-plugin-ui
2022-10-21T11:24:36.868+0200    INFO    Installing the plugin from github.com/dirien/trivy-plugin-ui...
2022-10-21T11:24:38.614+0200    INFO    Loading the plugin metadata...
And see the plugin in the list:
trivy plugin list
Installed Plugins:
  Name:    trivy-ui
  Version: 0.1.0
And execute the plugin:
trivy trivy-ui -- --image-name dexidp/dex:latest
In this blog post, we saq how to create a Trivy plugin using Rust 🦀. Plus, we used a TUI library to create a simple and good-looking TUI.
Next, we used jReleaser to create a release. And finally, we installed the plugin and ran it.
Feel free to check the source code of the plugin to create your own plugin or see how I created a TUI with Rust 🦀.