Flux Notification Controller: Create TLS Terminated Webhooks With KCert And Contour
TL;DR; Where Code?
As usual, here is the link to jump right into the code:
-> github.com/dirien/pulumi-do-flux-webhooks-k..
Introduction
In my previous blog post Flux With Buckets: Is This Still GitOps?, we made our first steps into the Flux ecosystem and discovered the usage of the resource Bucket as a powerful alternative to a version control system like Git.
Now I want to take a look into the Flux notification Controller, and how we can create a webhook to receive notification and an alert function to send notification to a specific provider endpoint. In our example it's going to be a generic webhook.
The fun part, and to give this blog article a little twist, we're going to use a TLS terminated webhook.And doing this by using KCert. And Contour will be our Ingress controller.
What Is The Task Of The Flux Notification Controller?
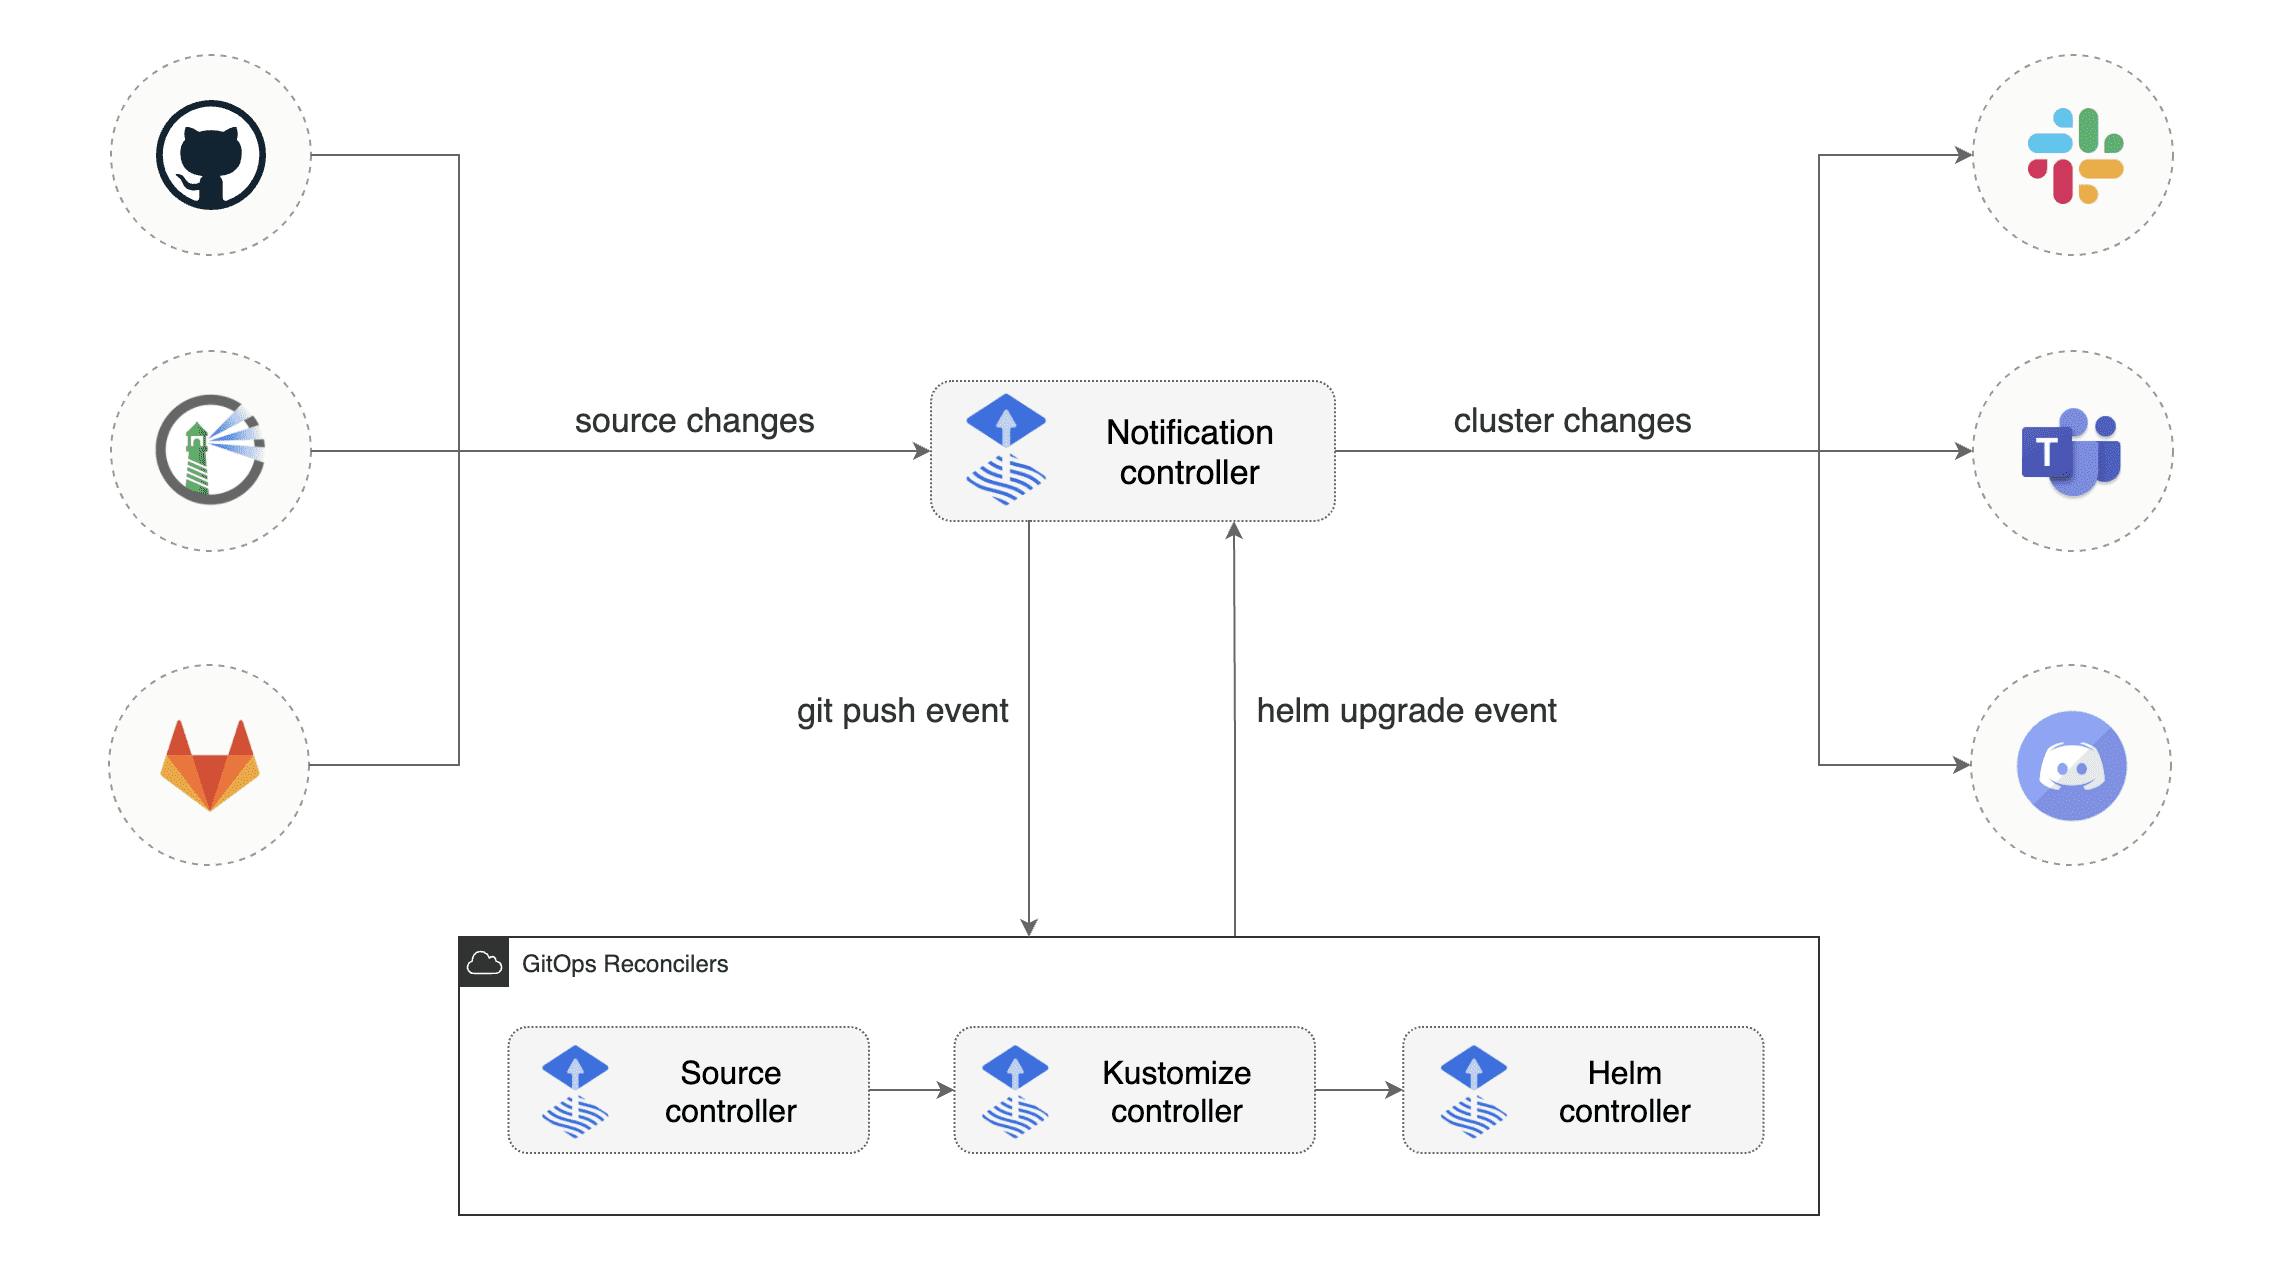
So what is the task of the notification controller? Well, actually it's quite simple and consist of two responsibilities:
First one is that the controller handles events coming from external systems (like GitHub, GitLab, etc.) and notifies the other Flux controllers about source changes.
Next task of the controller is, that it handles events emitted by the by and Flux controllers and dispatches them to external systems (Like Slack, Webex, etc.) based on event severity and the involved objects.
KCert
What is KCert? Let us check the claim on the GitHub page:
A Simple Let's Encrypt Cert Manager for Kubernetes
Okay that's very good! Simple is always good. So KCert is a simple alternative to the well known cert-manager.
One of the remarkable features I already spotted is: No CRDS required! That's very good! I like to reduce the amount of CRDS required in the Kubernetes cluster. On top the deployment looks very easy and simple.
So how does KCert work? KCert automatically creates certificates for ingresses with the kcert.dev/kcert=managed label. It creates an ingress to route .acme/challenge requests to the service.
Of course, it offers a lot more features, like a web UI for basic information and configuration details, automatically renews certificates and checks for certificate renewal (every 6h)
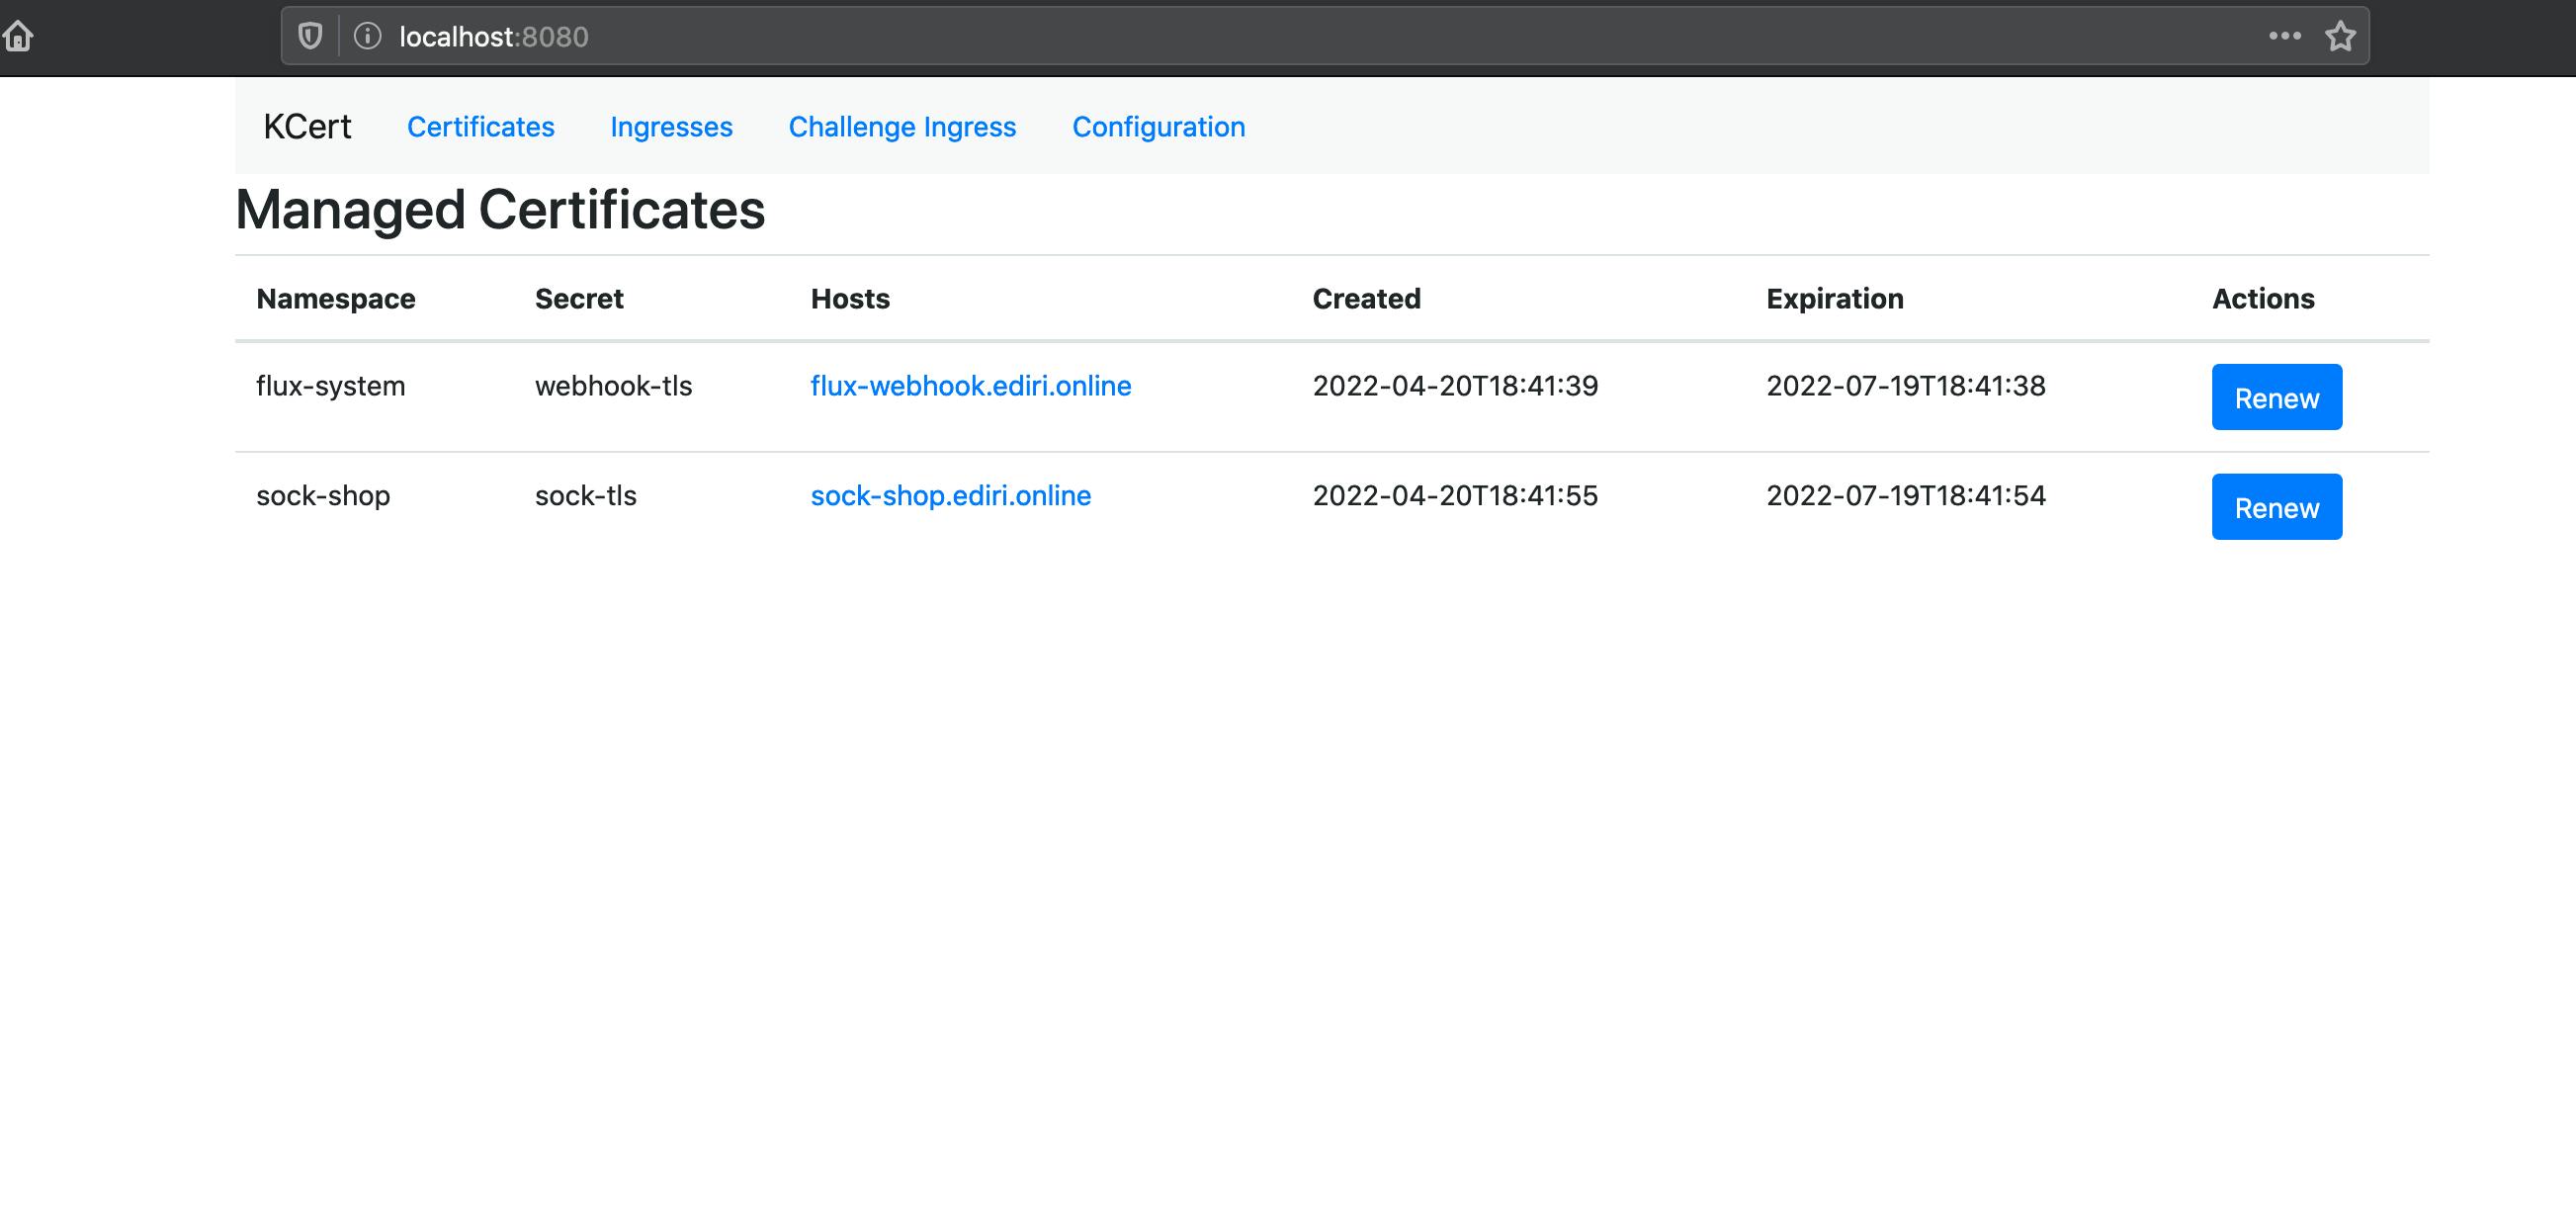
Currently, KCert does not offer a Helm Chart but a deploy.yaml file in the Git repository. I hope this is going to change in the future as I needed to do some moves with Flux to get KCert deployed via GitOps.
And KCert is also tested only with Nginx as ingress controller. But, I hacked my way around this. More later.
So, basically you just need to change following environment variables in the deployment:
- name: ACME__DIRURL
  value: # https://acme-staging-v02.api.letsencrypt.org/directory or https://acme-v02.api.letsencrypt.org/directory
- name: ACME__TERMSACCEPTED
  value: # You must set this to "true" to indicate your acceptance of Let's Encrypt's terms of service (https://letsencrypt.org/documents/LE-SA-v1.2-November-15-2017.pdf)
- name: ACME__EMAIL
  value: # Your email address for Let's Encrypt and email notifications
But as I wrote, I want to deploy it via Flux and use Contour!
These are the steps, I did to deploy KCert:
Create a Flux
GitRepositoryresource and point to the GitHub repository.Create a
Kustomizationresource and use the patch functionality of Kustomize to change the values in the deployment:
apiVersion: kustomize.toolkit.fluxcd.io/v1beta2
...
  sourceRef:
    kind: GitRepository
    name: kcert-repo
    namespace: kcert
  patches:
  - patch: |
      - op: replace
        path: /spec/template/spec/containers/0/env
        value:
        - name: ACME__DIRURL
          value: https://acme-staging-v02.api.letsencrypt.org/directory
        - name: ACME__TERMSACCEPTED
          value: "true"
        - name: ACME__EMAIL
          value: info@ediri.de
    target:
      kind: Deployment
      name: kcert
      namespace: kcert
Uff, much stuff going on here. But at the end it's just JSON patching.
I replaced the values of the env tag with my values.
- Get it work with Contour.
To hack the Contour support I had to change one value in the appsettings.json file. Without this, KCert would create the ingress for the acme challenge with the ingress class nginx and not contour.
"ChallengeIngress": {
  "Annotations": {
    "kubernetes.io/ingress.class": "contour"
  },
  "Labels": null
}
So, I changed the file and created a ConfigMap. Now I needed to mount this file to our container. So back to our Kustomization file and add new JSON patch rules to the patches tag:
...
 namespace: kcert
 patches:
   - patch: |
      - op: add
        path: /spec/template/spec/volumes
        value:
          - name: appsettings
            configMap:
              name: appsettings
      - op: add
        path: /spec/template/spec/containers/0/volumeMounts
        value:
        - name: appsettings
          mountPath: /app/appsettings.json
          subPath: appsettings.json
...
Now we are good to go! Check the kcert.yaml for the whole magic.
That's alle we need to do for now, lets head over to the demo app and see it in action.
The Demo
The demo application I am going to deploy is the Weaveworks Sock Shop.
We use the Bucket functionality like explained in the previous blog post Flux With Buckets: Is This Still GitOps? explained.
And we use this time DigitalOcean as cloud provider and DigitalOcean Spaces as provider for our Bucket. This will show again, how versatile the Bucket functionality is.
Prerequisites
The
FluxCLI should be installed on your machine. See the Flux CLI installationYou need to have an account at
DigitalOceanand have aDigitalOceanAPI token ready. Head over to DigitalOcean and create a new account and grab some 100$ credit.The
PulumiCLI should be present on your machine. InstallingPulumiis easy, just head over to the get-stated website and chose the appropriate version and way to download the cli. To store your state files, you can use their free SaaS offering
Creating the notification setup.
So we're going to create first the ingress part, with creating an Ingress resource.
apiVersion: networking.k8s.io/v1
kind: Ingress
metadata:
  name: webhook-receiver
  labels:
    kcert.dev/ingress: managed
  annotations:
    kubernetes.io/ingress.class: contour
spec:
  rules:
    - host: flux-webhook.ediri.online
      http:
        paths:
          - pathType: Prefix
            path: /
            backend:
              service:
                name: webhook-receiver
                port:
                  number: 80
  tls:
    - hosts:
        - flux-webhook.ediri.online
      secretName: webhook-tls
Here we can see that we are using the contour ingress class. And we add the KCert managed label to the ingress.
Please be aware to use rate limiting for the
webhook-receiveringress as every request to the receiver endpoint will result in request to the Kubernetes API as the controller needs to fetch information about the receiver. The receiver endpoint may be protected with a token, but it does not defend against a situation where a legitimate webhook source starts sending large amounts of requests, or the token is somehow leaked. This may result in unwanted consequences of the controller being rate limited by the Kubernetes API, degrading its functionality.
As a receiver we set our Kustomization resource, so we can reconcile the deployment with the webhook.
apiVersion: notification.toolkit.fluxcd.io/v1beta1
kind: Receiver
metadata:
  name: generic-receiver
  namespace: flux-system
spec:
  type: generic
  secretRef:
    name: webhook-token
  resources:
    - kind: Kustomization
      apiVersion: kustomize.toolkit.fluxcd.io/v1beta2
      name: demo-kustomization
Now heading over to the outbound part of the notification setup. We create an Alert resource, and set the eventSource to our sock-shop and demo-kustomization resource. Everytime there is a change on this resource, we will get informed through the webhook-notifier provider.
apiVersion: notification.toolkit.fluxcd.io/v1beta1
kind: Alert
metadata:
  name: webhook-alert
  namespace: flux-system
spec:
  providerRef:
    name: webhook-notifier
  eventSeverity: info
  eventSources:
    - kind: HelmRelease
      name: sock-shop
      namespace: flux-system
    - kind: Kustomization
      name: demo-kustomization
      namespace: flux-system
For Demo purposes we are going to use the webhook.site as our endpoint. In a real world scenario, you would most likely have a backend service or one of the predefined providers listed here
So in our case, the provider looks like this:
apiVersion: notification.toolkit.fluxcd.io/v1beta1
kind: Provider
metadata:
  name: webhook-notifier
  namespace: flux-system
spec:
  type: generic
  address: https://webhook.site/728428d2-ca2b-49c6-9c10-71128e8a895b
The Deployment
Similar to the last blog post, we have folder infrastructure, where I created two different Pulumi stacks. One for the cloud provider and one for deploying the Flux components, including the Bucket component.
For the Pulumi, I use the DigitalOcean provider pulumi-digitalocean. The deployment of the Flux component is identical to the last blog post.
Again you can boostrap the demo with the Makefile target:
make bootstrap
After a few minutes, you should see the following output:
make bootstrap
Bootstrapping DigitalOcean...
cd infrastructure/00-do && go mod tidy
Updating (dev)

View Live: https://app.pulumi.com/dirien/00-do/dev/updates/1
...
Resources:
    + 3 created

Duration: 9m34s
...
Bootstrapping Flux...
cd infrastructure/01-flux && go mod tidy
Updating (dev)

View Live: https://app.pulumi.com/dirien/01-flux/dev/updates/1
...
Resources:
    + 7 created


Duration: 50s
To deploy the manifest folder to the bucket we just created, I use again the Makefile with following command. But remember to change the endpoint-url to the region you created the DigitalOcean Spaces in.
make upload-do
This will print the instructions I need to run.
If everything went according to the plan, you should see the following output:
export AWS_ACCESS_KEY_ID=xxx
export AWS_SECRET_ACCESS_KEY=yyy
aws s3 sync ./deploy/ s3://flux-bucket/ --endpoint-url https://fra1.digitaloceanspaces.com
The Test
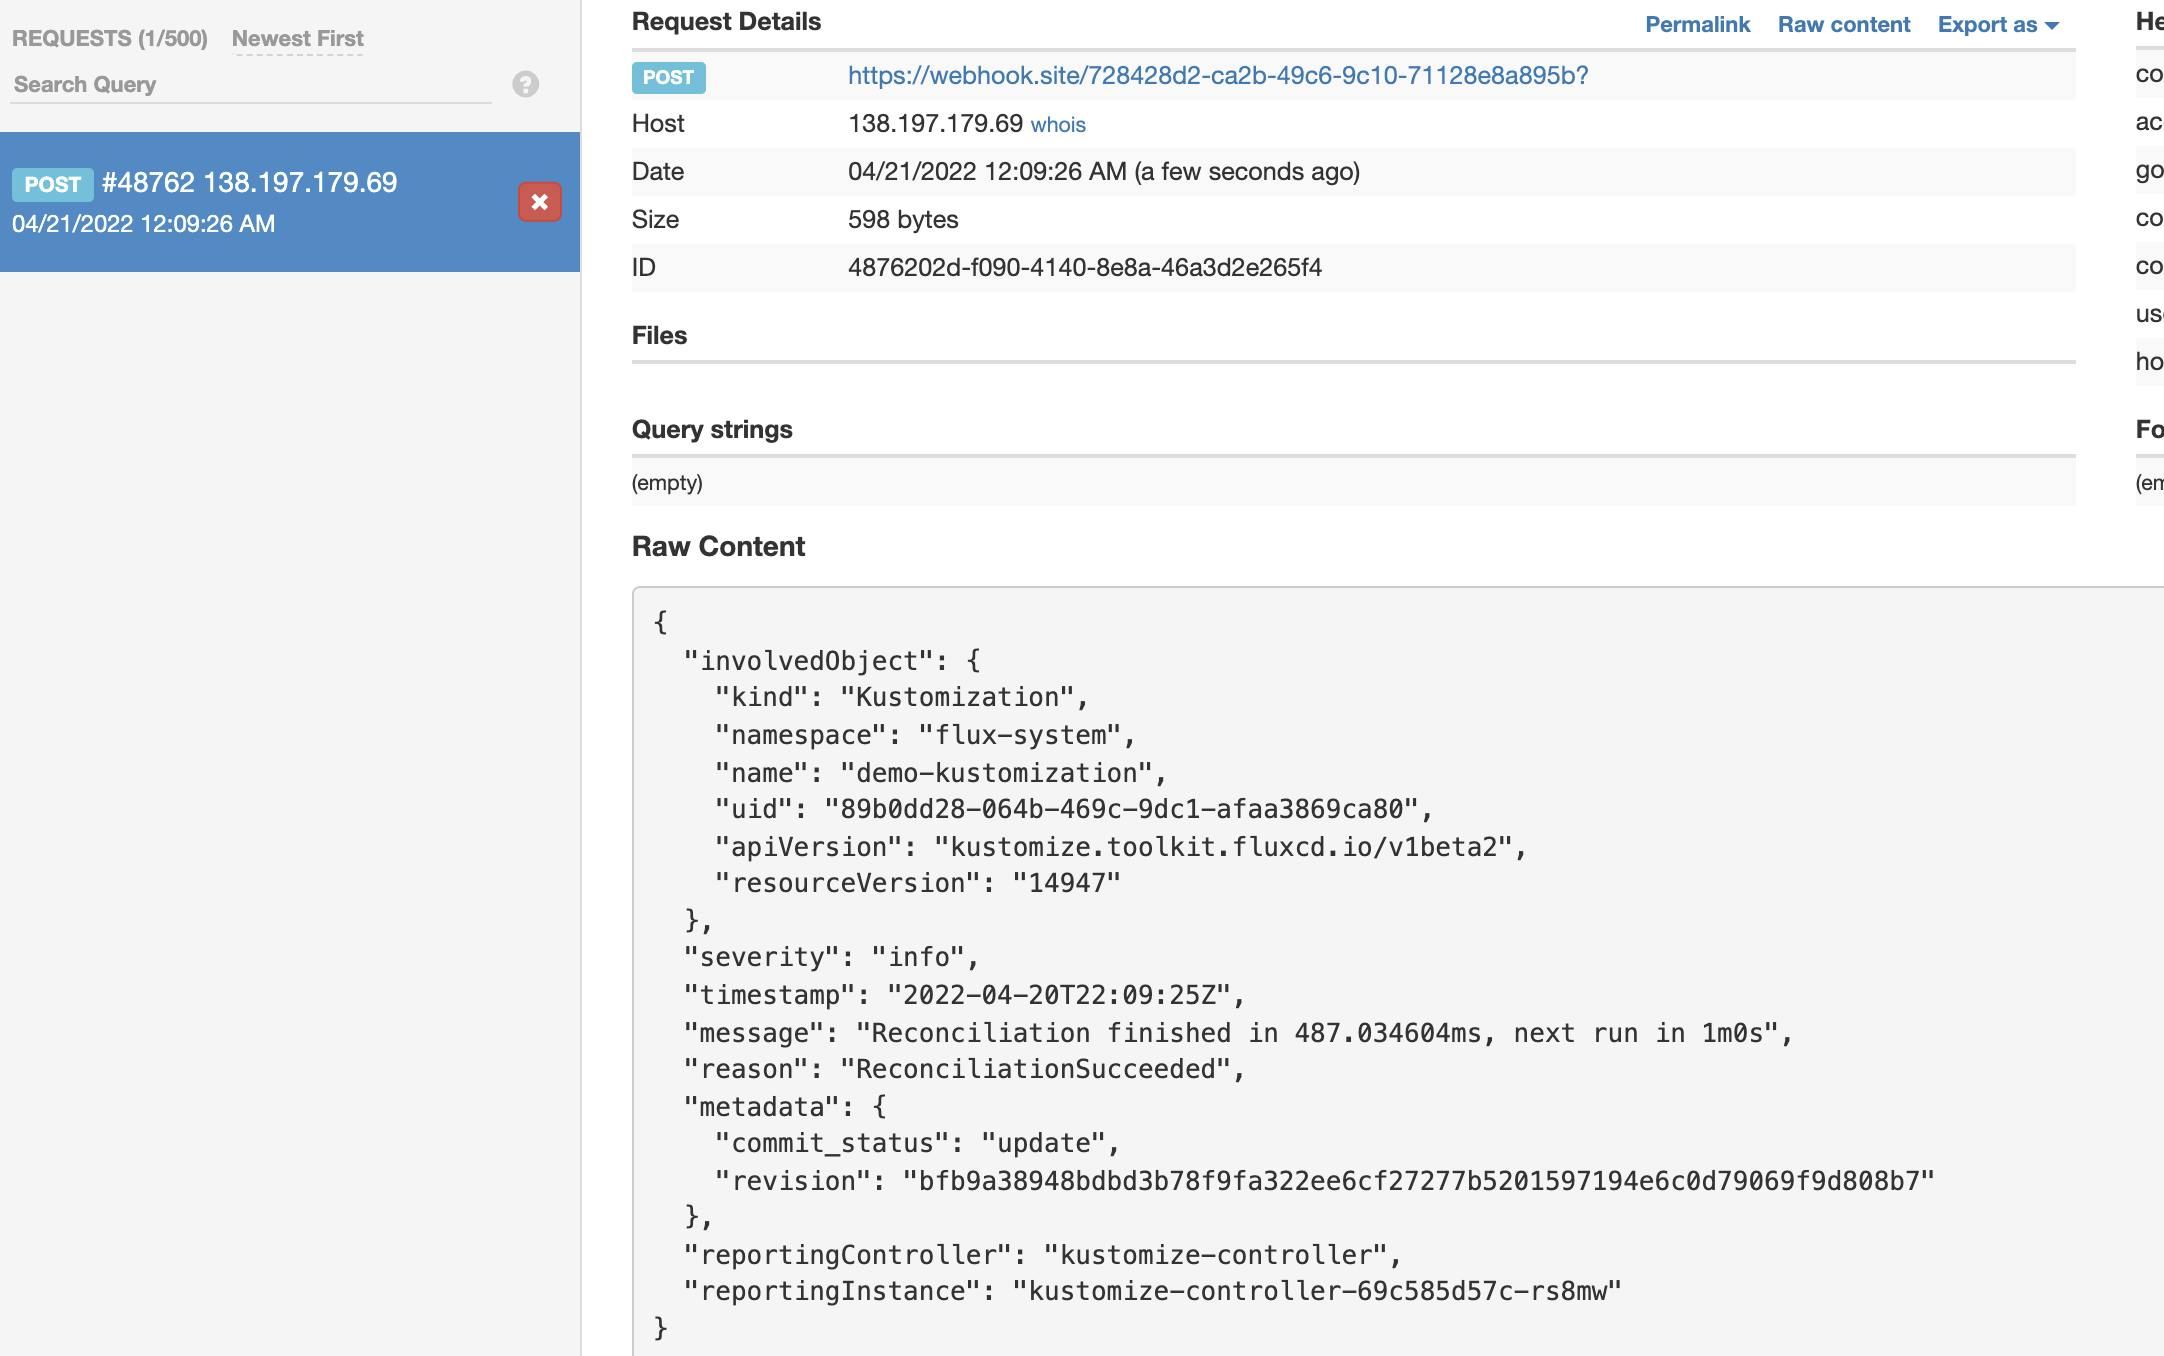
The first events you should see after the upload of the deployment to the bucket. So we can confirm that the alert is working.
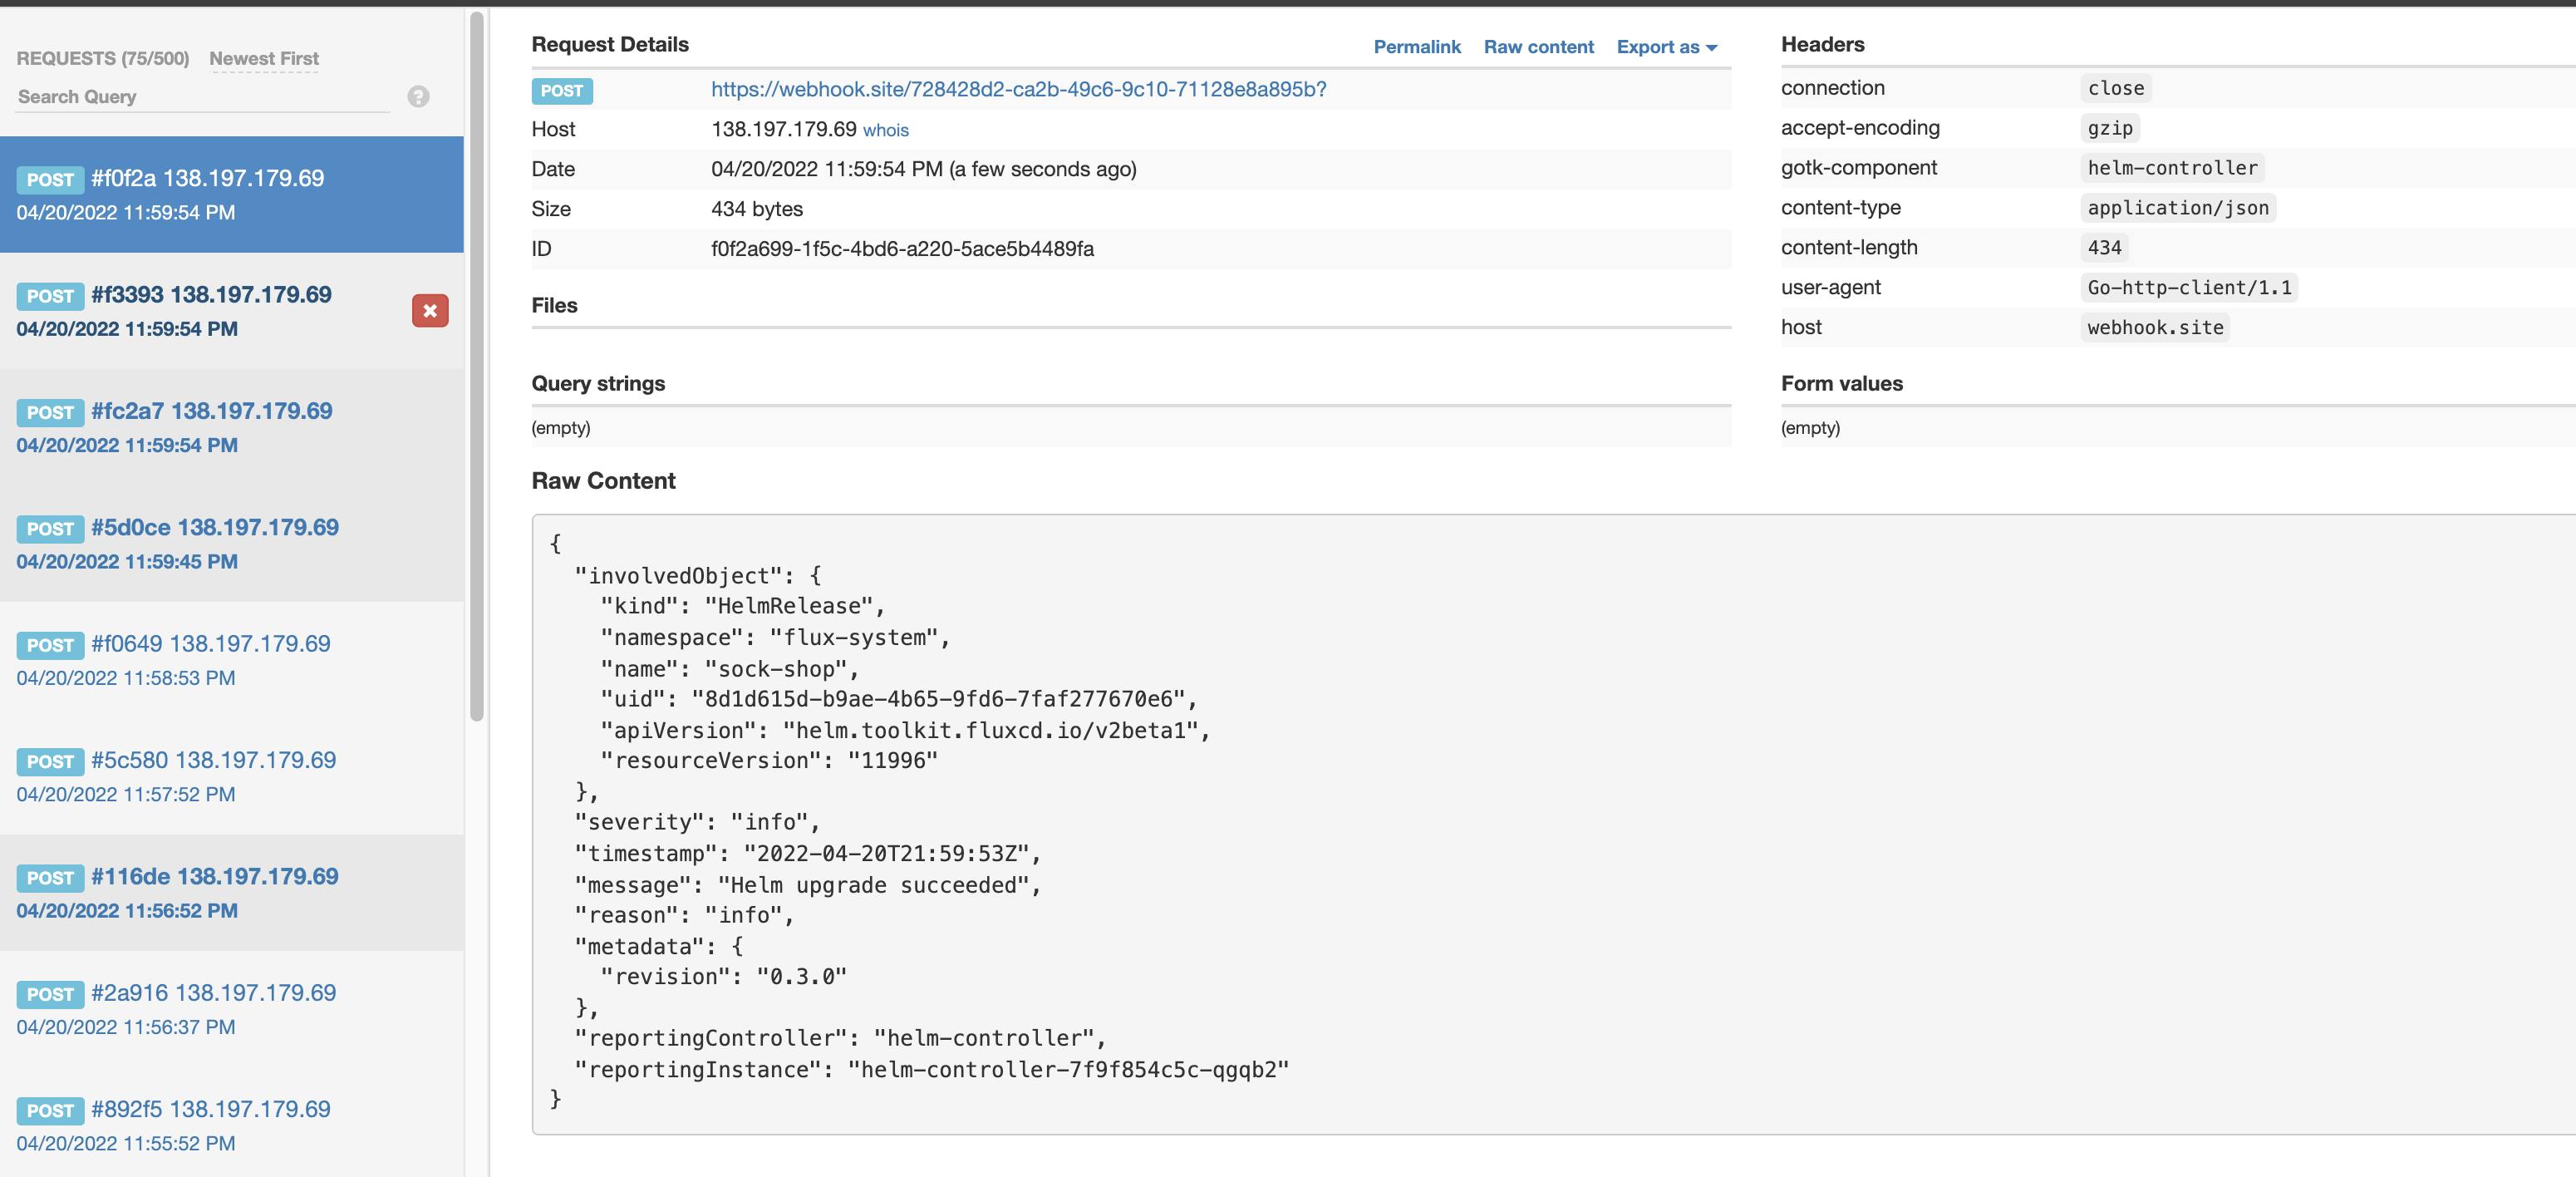
No let us check that the webhook is working. For this we need get the unique URL, what the notification controller generates for us
kubectl get receiver generic-receiver -n flux-system
NAME               AGE   READY   STATUS
generic-receiver   36m   True    Receiver initialized with URL: /hook/9f487e80cf8af0d58121c2557d9739b70551902e8e7ceda7863fd56b2003b932
and add this to the webhook host domain, we defined in our webhook ingress. Don't mind the -k flag, as I use in the demo the staging acme endpoint of Let's Encrypt.
curl -X POST https://flux-webhook.ediri.online/hook/9f487e80cf8af0d58121c2557d9739b70551902e8e7ceda7863fd56b2003b932 -k
You should see again in the webhook.site an event.
Cleanup
Type make destroy to clean up all the cloud resources, you just created.
Always clean up your unused cloud resources: Avoid cloud waste and save money!
Wrap up
We have now covered much ground on how to configure the Flux notification controller. We have now a good way to interact with Flux and trigger specific actions and get notified on certain events.
This will help us to gain a better understanding of the current state of our deployments and the cluster for classic Day-2 operations up to more sophisticated use cases like building an internal developer platform for example.

