Flexing the deployment: How to deploy a Minecraft Server with Azure Bicep
Using Azure Bastion, Azure Key Vault and Azure Spot Instances
TL;DR Code
-> github.com/dirien/infrastructure-as-code-wo..
Motivation
I wanted to play around with the Azure Bicep for a long time. Never found the right time or use case to do this. But then I thought: What if I just create a Minecraft Server via Bicep.
So that's the origin of this blog article. I hope you going to enjoy it.

What is Bicep?
Bicep is a domain-specific language (DSL) that uses declarative syntax to deploy Azure resources. In a Bicep file, you define the infrastructure you want to deploy to Azure, and then use that file throughout the development lifecycle to repeatedly deploy your infrastructure.
Benefits of Bicep
Bicep provides the following advantages:
Support for all resource types and API versions: Bicep immediately supports all preview and GA versions for Azure services.
Simple syntax
Repeatable results: Bicep files are idempotent, which means you can deploy the same file many times and get the same resource types in the same state.
Orchestration: You don't have to worry about the complexities of ordering operations.
Modularity: You can break your Bicep code into manageable parts by using modules.
Preview changes: You can use the what-if operation to get a preview of changes before deploying the Bicep file
No state or state files to manage: All state is stored in Azure.
No cost and open source: Bicep is completely free.
Install Bicep
There are different ways to install the Bicep cli. I will use the Azure CLI, assuming that the majority of people in the Azure Cloud space have the CLI already installed.
To start the Bicep CLI installation, just type:
az bicep install
To upgrade to the latest version, use:
az bicep upgrade
To validate the install, use:
az bicep version
There is also a greate Visual Studio Code extension, I found very useful to work with. I put the link under Resources in the end of this tutorial.
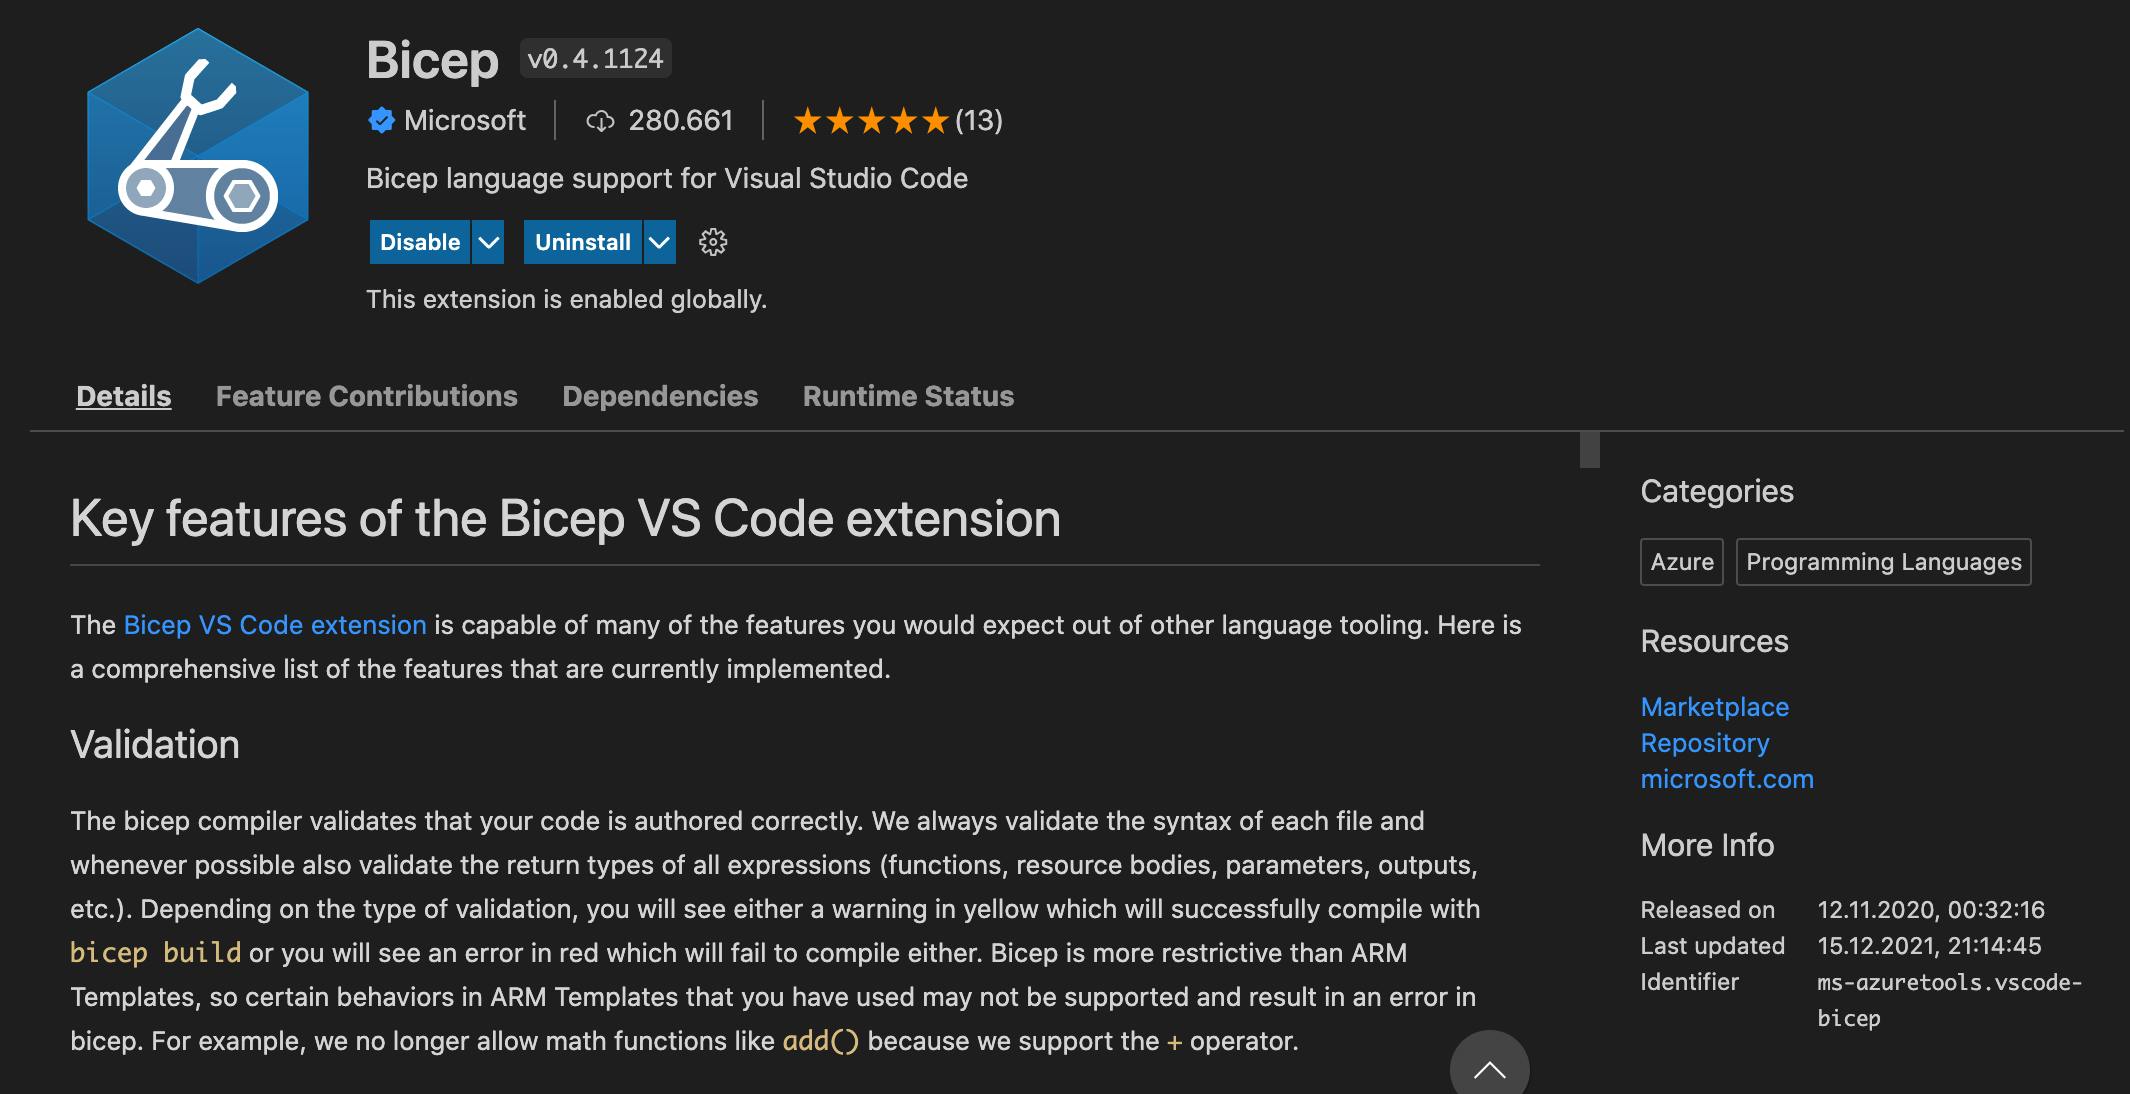
It is very helpful to use VS code as IDE for Bicep. The integration is very, very good. And for me it was one of the rare cases, I am not using JetBrains IntelliJ.
Learn Bicep
If you're new to Bicep, a great way to get started is by taking this module on Microsoft Learn.
There you'll learn how Bicep makes it easier to define how your Azure resources should be configured and deployed in a way that's automated and repeatable.
-> docs.microsoft.com/en-us/azure/azure-resour..
Architecture
Here is a diagramm of the of what is going to be the architecture of our deployment:
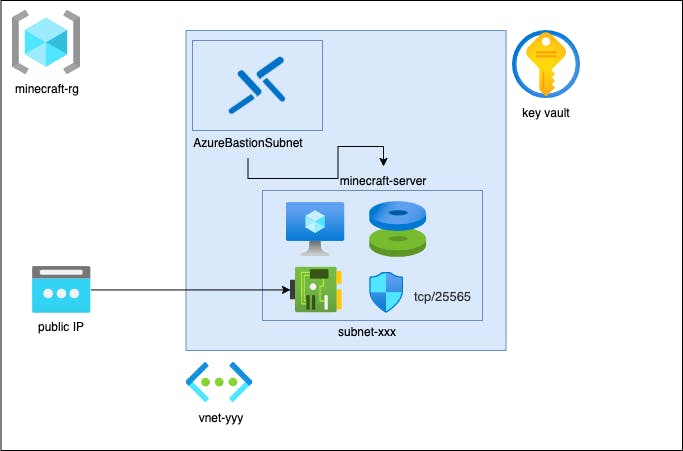
Very easy, the idea is to play with Bicep. Nevertheless I try to include some Azure features like Bastion or Key Vault into the mix.
Azure Bastion
To connect to our VM, we use the Azure Bastion Service. Azure Bastion is a fully managed service that provides more secure and seamless Secure Shell Protocol (SSH) access to virtual machines without any exposure through public IP addresses.
Azure Key Vault
Azure Key Vault is a cloud service for securely storing and accessing secrets and we going to save our SSH key there. With this in place, we can just choose the Key Valut when we connect with Azure Bastion to our Minecraft Server!
Networking
We need to create a public IP address to connect to our Minecraft server. But we will expose only the ports 25565, 25575 and 9090. The first port is for the Minecraft server and the second port is for the RCON. With the RCON, we can manage our Minecraft server. The 9090 is for the Promehteus server, to get some nice metrics out of our Server.
VM
As the OS on our VM we choose Ubuntu 20.04 LTS. To provison our fresh VM, we will use cloud-init. You can find the cloud-init script under config/papermc-cloud-init.yaml
The script will take care that all the things necessary will be downloaded and correctly configured to start the Minecraft Server. This is very handy, as we do not need to run any additional configurations afterwards.
...
  - URL="https://papermc.io/api/v2/projects/paper/versions/1.18.1/builds/136/downloads/paper-1.18.1-136.jar"
  - curl -sLSf $URL > /minecraft/server.jar
  - echo "eula=true" > /minecraft/eula.txt
  - mv /tmp/server.properties /minecraft/server.properties
  - chmod a+rwx /minecraft
  - systemctl restart minecraft.service
  - systemctl enable minecraft.service
In addition, we use Azure Spot Instance. This will help us to save money on our Minecraft server.
We set the eviction policy to Deallocate The Deallocate policy moves your VM to the stopped-deallocated state, allowing you to redeploy it later. However, there is no guarantee that the allocation will succeed. The deallocated VMs will count against your quota, and you will be charged storage costs for the underlying disks.
Bicep
Our deployment consists of the following four Bicep modules in the modules folder
- bastion.bicep
- keyvault.bicep
- minecraft.bicep
- network.bicep
And the main.bicep file to compose the modules into one deployment.
Bastion
The bastion.bicep file, will create our Azure Bastion. Something to mention is that we reference with the keyword existing our vnet resource. This is similar to the Terraform Data Source.
With this, we can access the properties of a resource, we did not create in the module. The actual definition of the vnet happens in the network.bicep file.
resource vnet 'Microsoft.Network/virtualNetworks@2021-03-01' existing = {
  name: vnetName
}
...
resource bastionHost 'Microsoft.Network/bastionHosts@2021-05-01' = {
  name: 'bastion-${uniqueString(resourceGroup().id)}-bh'
  location: location
  tags: {
    'app': 'minecraft'
    'resources': 'bastionHost'
  }
  properties: {
    ipConfigurations: [
      {
        name: 'IpConf'
        properties: {
          subnet: {
            id: vnet.properties.subnets[1].id
          }
          publicIPAddress: {
            id: publicIp.id
          }
        }
      }
    ]
  }
}
...
Key Vault
In the keyvault.bicep we configure the access policies for the different user (ourselves and the service principal) and create a secret with the ssh private key.
...
resource keyvault 'Microsoft.KeyVault/vaults@2019-09-01' = {
  name: 'keyvaul-${uniqueString(resourceGroup().id)}'
  location: location
  tags: {
    'app': 'minecraft'
    'resources': 'keyvault'
  }
  properties: {
    enabledForDeployment: true
    enabledForTemplateDeployment: true
    enabledForDiskEncryption: false
    tenantId: subscription().tenantId
    accessPolicies: accessPolicies
    sku: {
      name: sku
      family: 'A'
    }
    networkAcls: {
      defaultAction: 'Allow'
      bypass: 'AzureServices'
    }
  }
}

resource secret 'Microsoft.KeyVault/vaults/secrets@2018-02-14' = {
  name: '${keyvault.name}/ssh'
  tags: {
    'app': 'minecraft'
    'resources': 'secret'
  }
  properties: {
    value: sshKey
  }
}
Network
The network.bicep contains the virtual network and subnet definitions.
...
resource vnet 'Microsoft.Network/virtualNetworks@2021-05-01' = {
  name: 'vnet-${uniqueString(resourceGroup().id)}'
  location: location
  tags: {
    'app': 'minecraft'
    'resources': 'vnet'
  }
  properties: {
    addressSpace: {
      addressPrefixes: [
        addressPrefix
      ]
    }
    subnets: [
      {
        name: 'subnet-${uniqueString(resourceGroup().id)}'
        properties: {
          addressPrefix: subnetAddressPrefix
        }
      }
      {
        name: 'AzureBastionSubnet'
        properties: {
          addressPrefix: bastionSubnetIpPrefix
        }
      }
    ]
  }
}
...
Minecraft
The heart of this deployment is the minecraft.bicep file. This contains the actual definition of the Minecraft VM, the public IP address and the network security group with the ingress definitions for the ports 25565, 25575 and 9090.
The disk size is 30GB, which is enough to play. The vmSize is configurable, to and per default set to Standard_D2_v2.
resource nsg 'Microsoft.Network/networkSecurityGroups@2021-05-01' = {
  name: '${computerName}-${uniqueString(resourceGroup().id)}-nsg'
  location: location
  tags: {
    'app': 'minecraft'
    'name': computerName
    'resources': 'nsg'
  }
  properties: {
    securityRules: [
      {
        name: 'minecraft'
        properties: {
          priority: 1001
          protocol: 'Tcp'
          access: 'Allow'
          direction: 'Inbound'
          sourceAddressPrefix: '*'
          sourcePortRange: '*'
          destinationAddressPrefix: '*'
          destinationPortRange: '25565'
        }
      }
      {
        name: 'minecraft-rcon'
        properties: {
          priority: 1002
          protocol: 'Tcp'
          access: 'Allow'
          direction: 'Inbound'
          sourceAddressPrefix: '*'
          sourcePortRange: '*'
          destinationAddressPrefix: '*'
          destinationPortRange: '25575'
        }
      }
    ]
  }
}
...
resource vm 'Microsoft.Compute/virtualMachines@2021-07-01' = {
  name: '${computerName}-${uniqueString(resourceGroup().id)}-vm'
  location: location
  tags: {
    'app': 'minecraft'
    'name': computerName
    'vmSize': vmSize
    'resources': 'virtualMachine'
  }
  properties: {
    hardwareProfile: {
      vmSize: vmSize
    }
    storageProfile: {
      osDisk: {
        createOption: 'FromImage'
        name: '${computerName}-${uniqueString(resourceGroup().id)}-disk'
        diskSizeGB: 30
      }
      imageReference: {
        publisher: 'Canonical'
        offer: '0001-com-ubuntu-server-focal'
        sku: '20_04-lts'
        version: 'latest'
      }
    }
    priority: 'Spot'
    evictionPolicy: 'Deallocate'
    billingProfile: {
      maxPrice: -1
    }
    networkProfile: {
      networkInterfaces: [
        {
          id: nic.id
          properties: {
            primary: true
          }
        }
      ]
    }
    osProfile: {
      computerName: computerName
      adminUsername: adminUsername
      customData: customData
      linuxConfiguration: {
        patchSettings: {
          patchMode: 'AutomaticByPlatform'
        }
        ssh: {
          publicKeys: [
            {
              path: '/home/${adminUsername}/.ssh/authorized_keys'
              keyData: sshPublicKey
            }
          ]
        }
      }
    }
  }
}
...
Main
In our main.bicep we now just need to call them, with the properties, we want to overwrite:
param location string = resourceGroup().location

param objectId string
param userId string

module minecraftVault 'modules/keyvault.bicep' = {
  name: 'minecraft-vault'
  params: {
    serviceAccountObjectID: objectId
    currentUserObjectId: userId
    sshKey: loadTextContent('../ssh/workshop')
  }
}

module minecraftVnet 'modules/network.bicep' = {
  name: 'minecraft-vnet'
  params: {
    location: location
  }
}

module minecraftBastion 'modules/bastion.bicep' = {
  name: 'minecraft-bastion'
  params: {
    location: location
    vnetName: minecraftVnet.outputs.vnetName
  }
}

var minecraftServeNames = [
  'minecraft-server-1'
]

module minecraftServer 'modules/minecraft.bicep' = [for name in minecraftServeNames: {
  name: name
  params: {
    location: location
    vnetName: minecraftVnet.outputs.vnetName
    adminUsername: 'minecraft'
    computerName: name
    sshPublicKey: loadTextContent('../ssh/workshop.pub')
    customData: loadFileAsBase64('config/papermc-cloud-init.yaml')
  }
}]

output minecraftPublicIP array = [for (item, index) in minecraftServeNames: {
  name: item
  value: minecraftServer[index].outputs.minecraftPublicIP
}]
Deployment
Before we deploy, we need to create a service principal. Change the value <subscription_id> with the ID of your subscription. I gave the service principal the nameMinecraftDeployer`.
az ad sp create-for-rbac \
--name MinecraftDeployer \
--role Contributor \
--scopes /subscriptions/<subscription_id>/resourceGroups/minecraft-rg \
--sdk-auth
Then we can deploy the whole stack. We just need to call following commands in our pipeline or command line:
az group create --name minecraft-rg --location westeurope
az configure --defaults group=minecraft-rg
SP_OBJECT_ID=$(az ad sp list --display-name MinecraftDeployer --query '[].objectId' --output tsv)
USER_OBJECT_ID=$(az ad user list  --query '[].objectId' --output tsv)
See any changes, with what-if:
az deployment group what-if --template-file main.bicep --mode Complete --parameters objectId=$SP_OBJECT_ID --parameters userId=$USER_OBJECT_ID
Or rollout the deployment with:
az deployment group create --template-file main.bicep --template-file main.bicep --mode Complete --parameters objectId=$SP_OBJECT_ID --parameters userId=$USER_OBJECT_ID
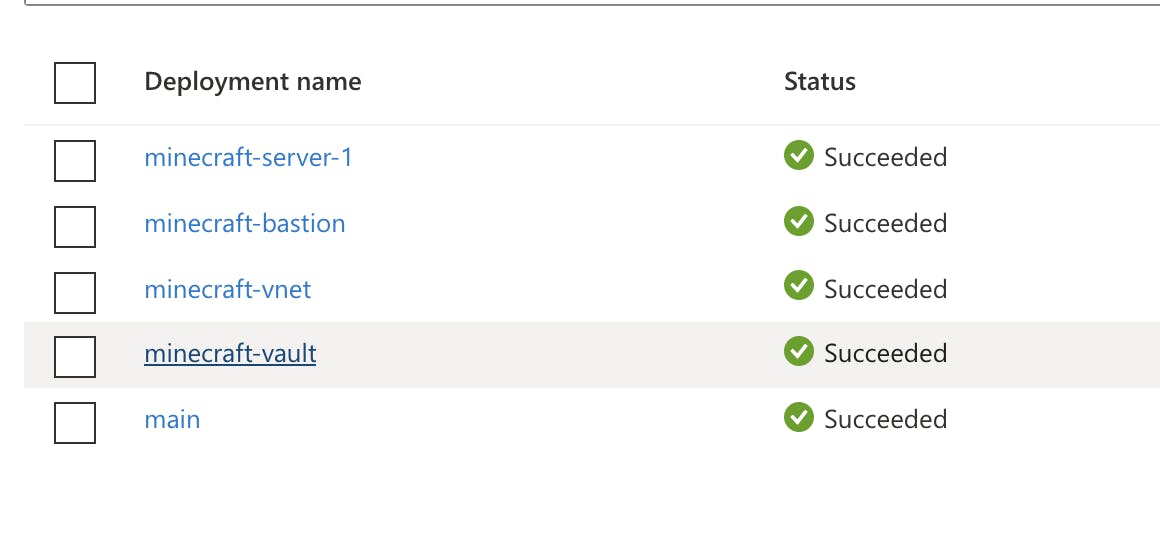
If everything is successfully rolled out, you should see this in the Azure UI
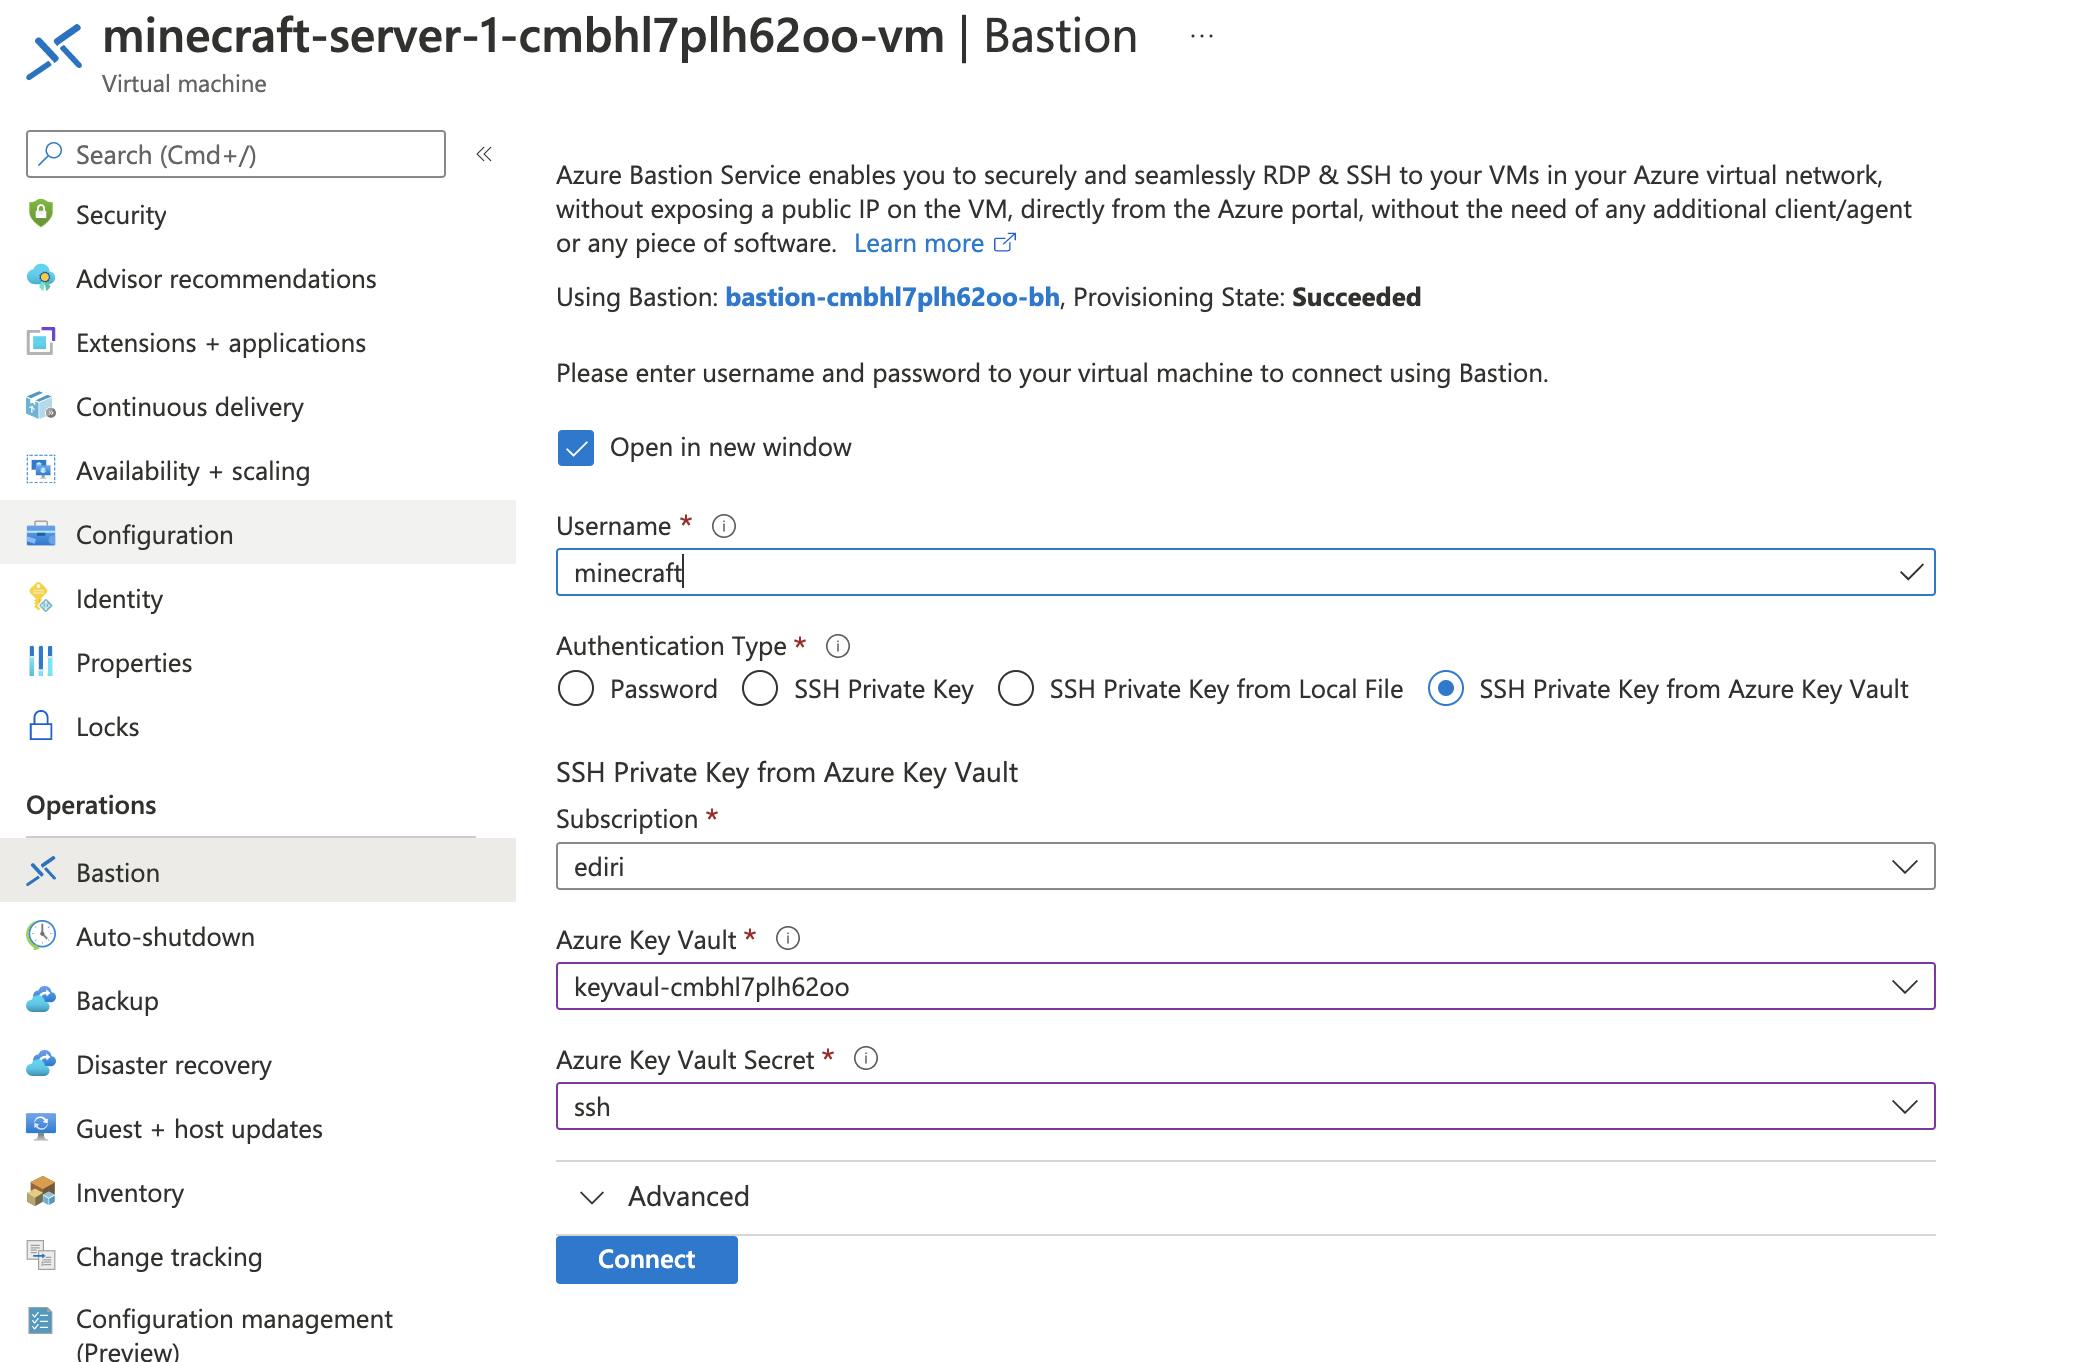
And can connect via Azure Bastion to your vm
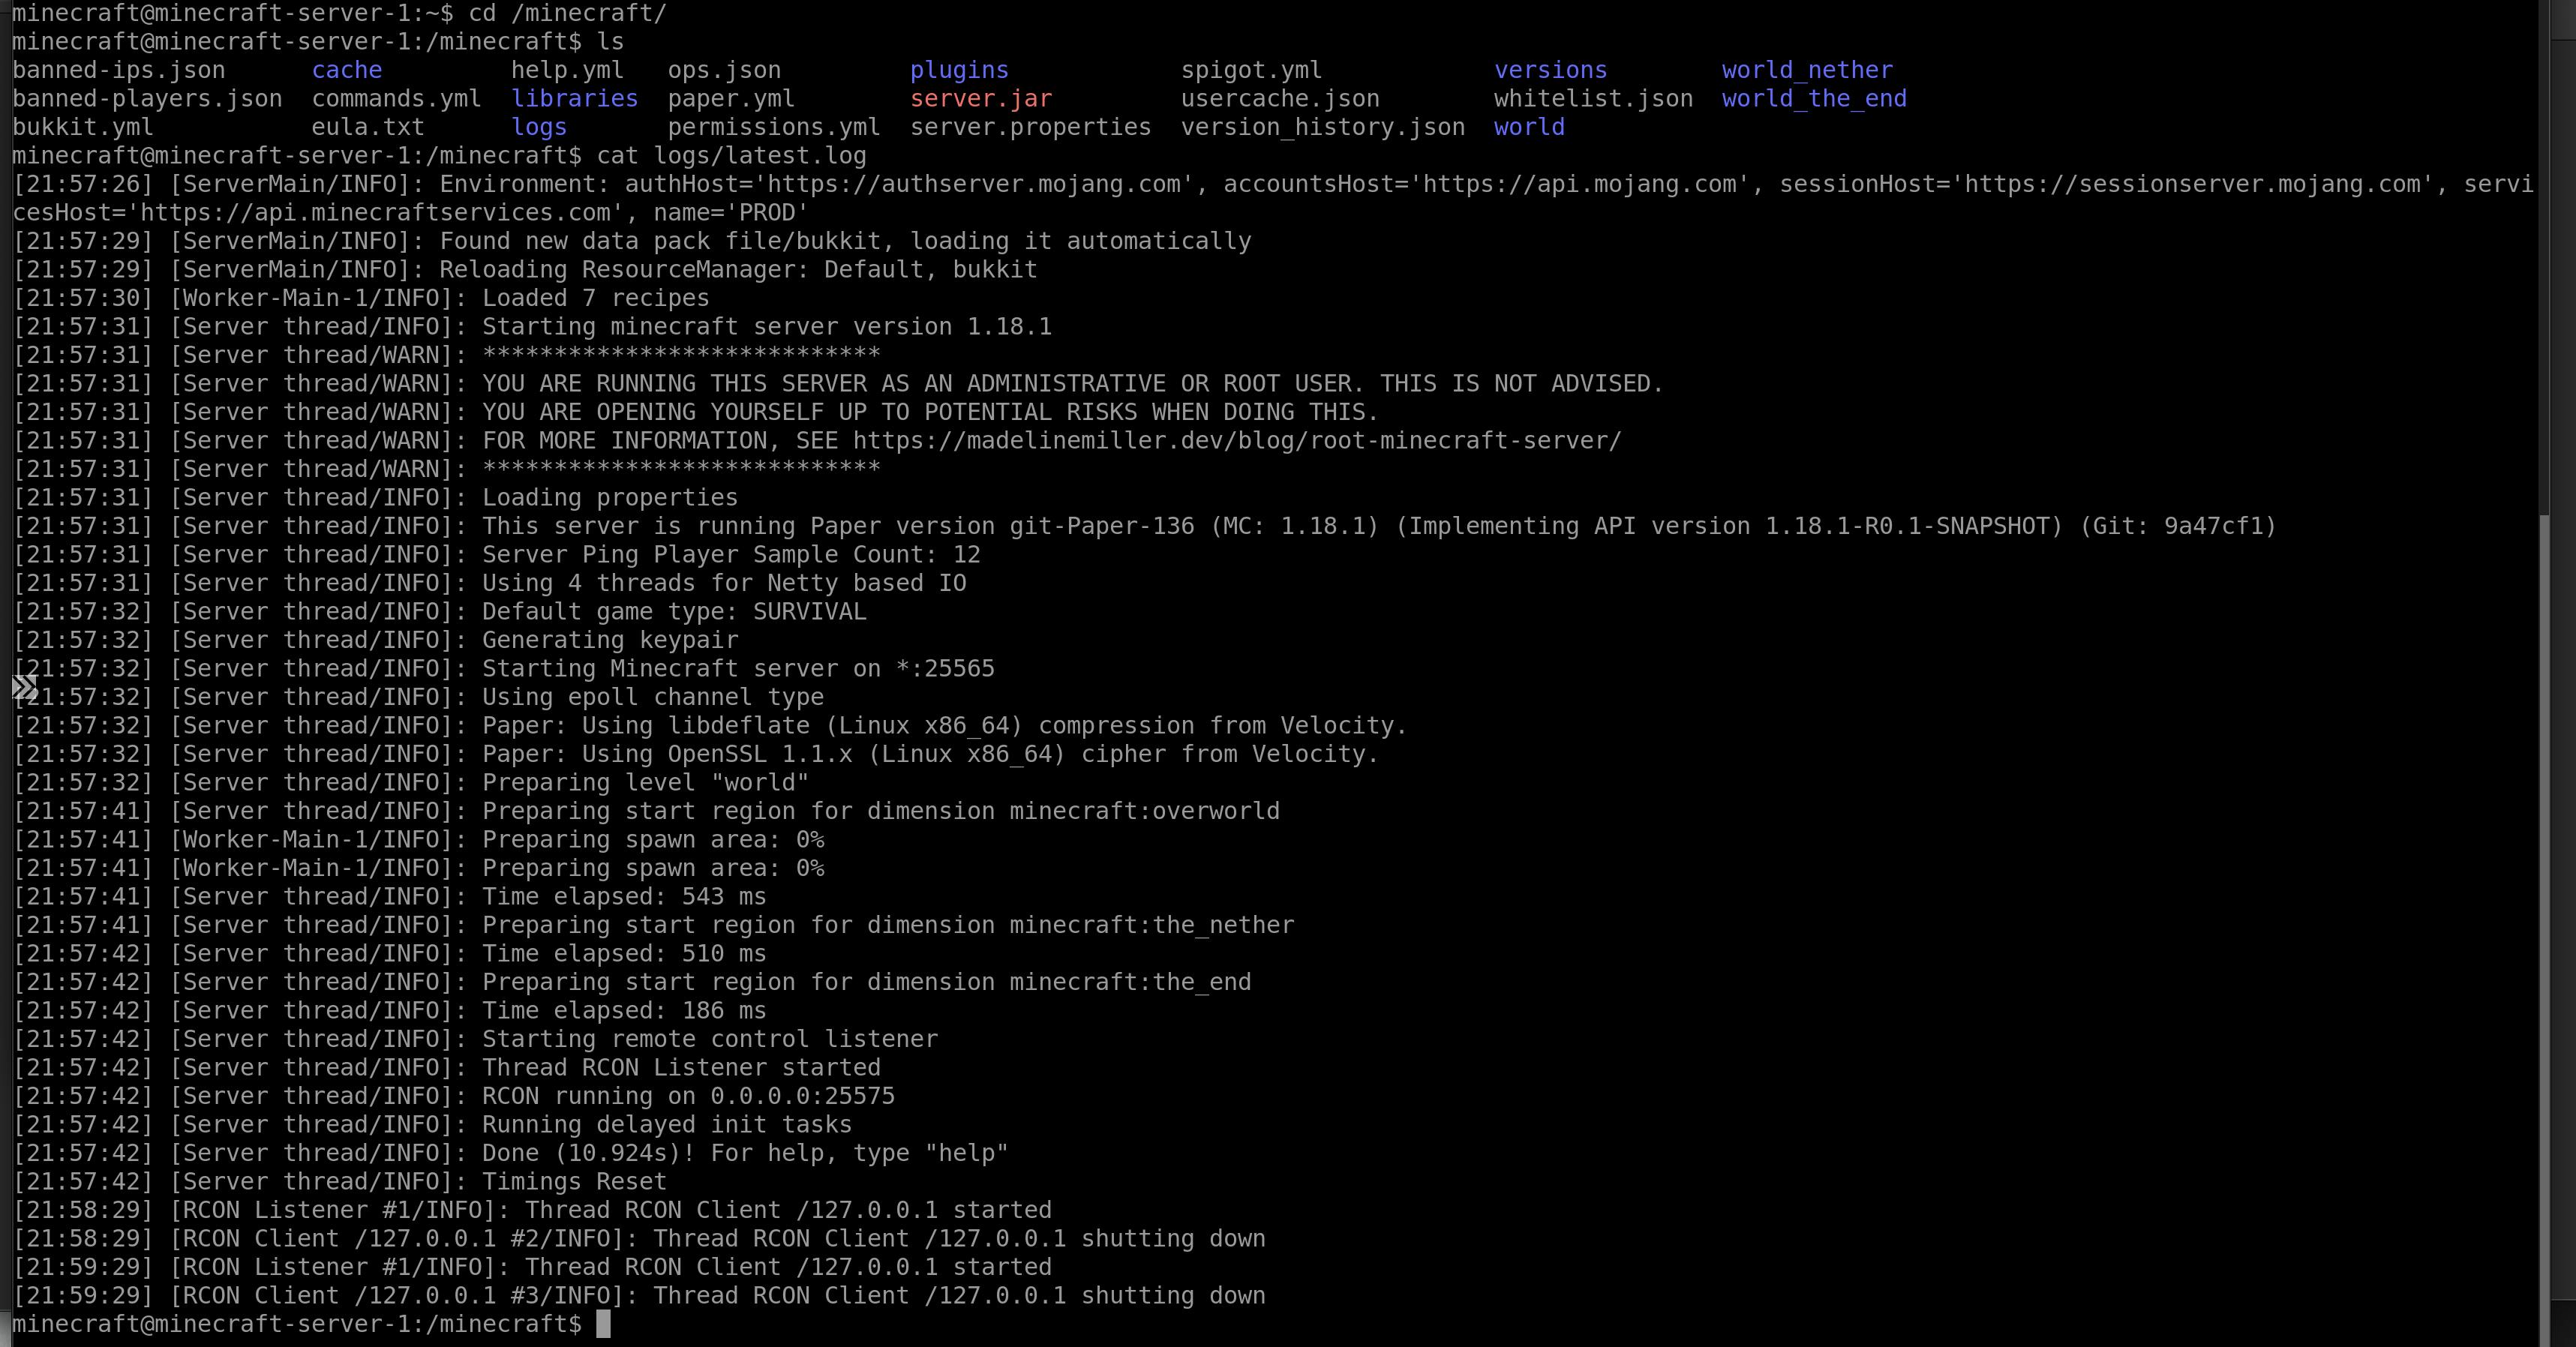
Looks very good! Let' fire up the client. First we need the public IP address. With the command:
az deployment group show -n main --query properties.outputs.minecraftPublicIP.value --output tsv
We get the minecraftPublicIP and can use this to configure our client
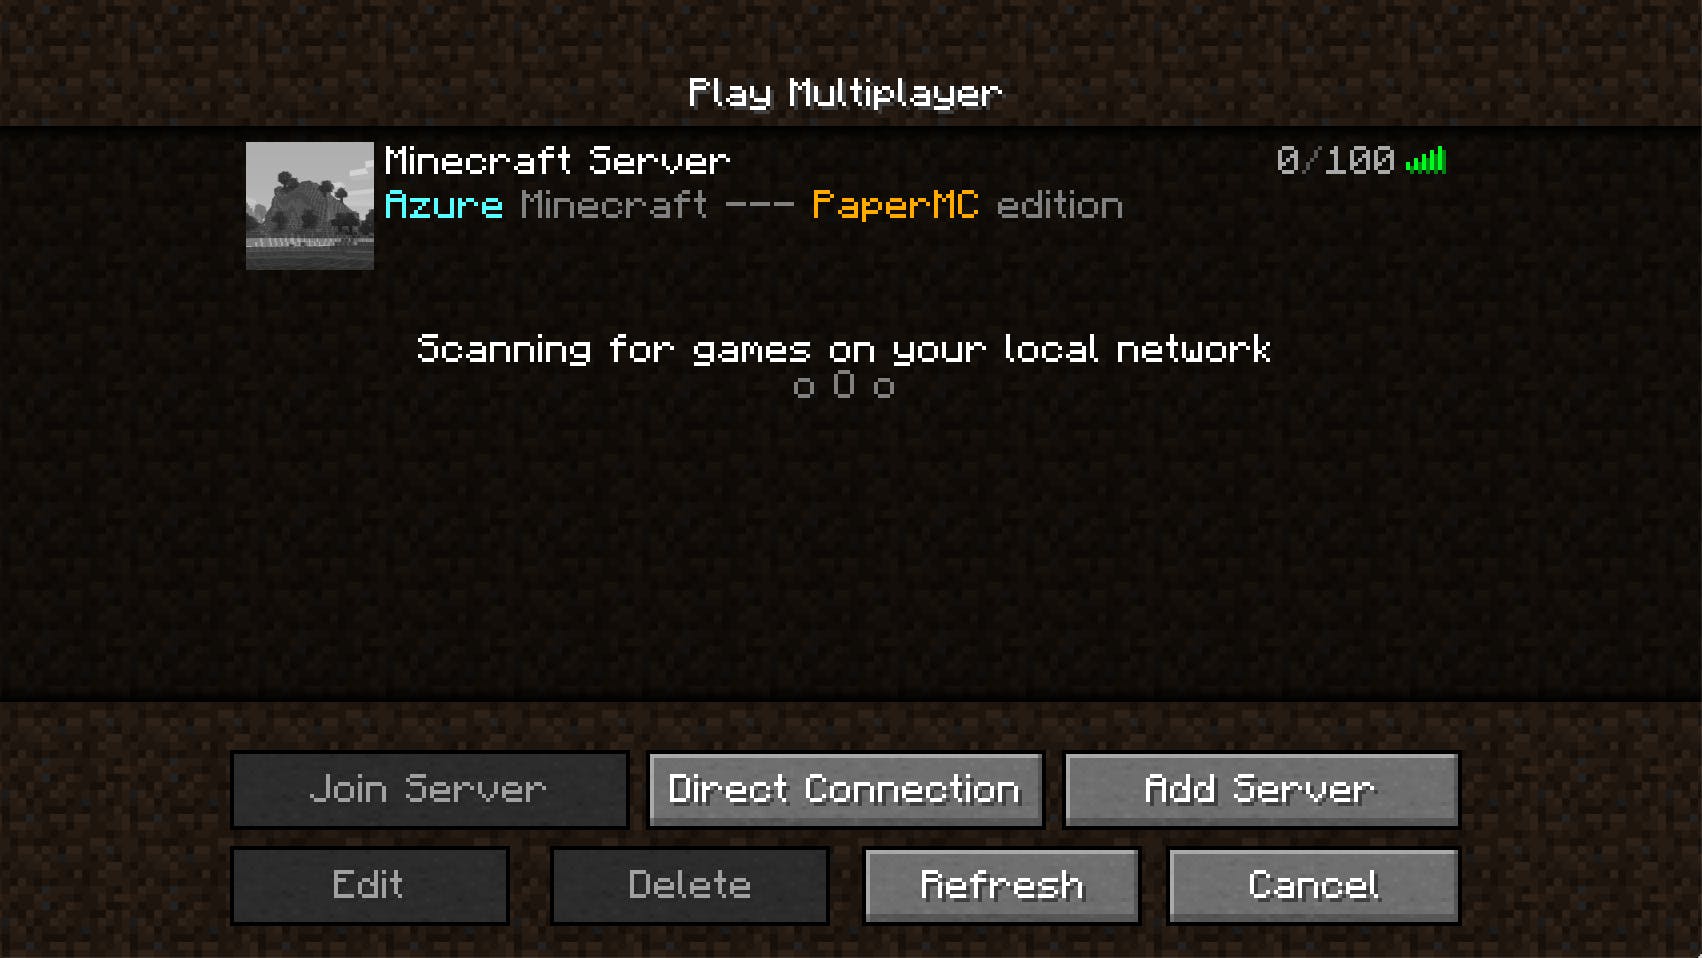
And finally play Minecraft on Azure, created via your Bicep!
